
Welcome to the PediaWise Feeding Primer! This Primer will give you the low-down on how (and what) to feed your baby during their first year of life. There’s a bunch of info in this article so sift through it at your own pace and digest it in bits and pieces.
In This Primer, We’ll Focus on the Following Topics:
Get Wise(r) About These Topics Below…
An Overview of Feeding During the First Year of Life

Your Baby’s Feeding Needs Will Change and Evolve During Their First Year of Life. To Help You Keep Up With the Changes, Here are the Top 10 Rules and Recommendations for Feeding Infants (0-1 Years):
1. Babies Only Need Breast Milk and/or Formula (or a Combo of the Two) for Their First 4-6 Months of Life.
2. Solid Foods (Pureed Baby Foods) Start at 4-6 Months of Age. The American Academy of Pediatrics (the AAP) Likes 6 Months.
Insider Info: Breast milk and/or formula will remain the mainstay of your baby’s diet until 1 year of age. In the beginning, solid foods are mostly given for fun and to enhance your baby’s oral motor and fine motor skills. Therefore, your little one will get most of their nutrition from the breast milk and/or formula during their first year of life. For this reason, you do NOT have to decrease the amount of breast milk or formula that you give your baby when you first introduce solid foods.
3. If You Follow the AAP’s Recommendation and Introduce Solid Foods at 6 Months, Your Baby May Need To Take a Daily Iron Supplement From 4 Months of Age Until They Start Solid Foods. (This Is Only True For Babies Who Take Breast Milk For More Than Half Their Feeds.)
Why? Because an infant’s iron stores become depleted around 4 months of age and breast milk doesn’t have enough iron to make up the difference. Most formulas, on the other hand, contain iron, so babies who take adequate amounts of formula don’t need an iron supplement.
Caveat: Babies born prematurely (before 37 weeks) have fewer iron stores than their full-term counterparts. As a result, these babies typically need to take an iron supplement (like Poly-Vi-Sol with iron) starting from birth even if they’re drinking formula. If your baby was born prematurely and they take an iron supplement, the doctor will let you know when you can discontinue it.
4. The AAP Recommends That Women Breastfeed Their Babies Until They’re 2-Years-Old (and to Go Past 2 Years If Mutually Desired).1
Hot Off the Press: The AAP updated their breastfeeding recommendations in June 2022. The old recommendation was to breastfeed until 1 year of age (or beyond if both Mom and baby wanted to). The AAP upped the breastfeeding time to 2 years because of the numerous benefits that breastfeeding provides for both Mom and baby. Get Wise(r) about these benefits later in this article.
5. If You Decide to Go the Formula Route, Pick a Formula That Contains Iron (Most Do).
6. Don’t Give Your Baby Plain Water Until 6 Months of Age.
Why Not? Because breast milk AND formula have plenty of water in them. Moreover, “free water” (as doctors like to call it) can cause electrolyte imbalances in babies (think: low sodium levels) and lead to seizures.
7. If You’re Exclusively Breastfeeding Your Baby OR They’re Taking Fewer Than 32 Ounces of Formula Per Day, Start Them on a Daily Vitamin D Supplement. (Make Sure to Run This By Their Doctor, Though, First.)
The standard recommended daily dose of Vitamin D for babies under 1 year is 400 International Units per day. Get Wise(r) about Vitamin D Supplementation and How to Give It.
8. Start Giving Your Baby Whole Cow’s Milk (or a Cow’s Milk Alternative) at 1 Year of Age. At This Point, You Can Discontinue the Formula Feeding If You’ve Been Giving Your Baby Formula. You May Continue to Breastfeed, Though (If You’d Like), In Addition to Giving the Whole Milk.
Sneak Peek: When your child reaches 2 years of age, the pediatrician will probably recommend they switch to 2% milk or skim milk from whole milk.
Caveat: Babies who are tipping the scales or who have a family history of obesity may be encouraged to transition to a lower fat milk earlier. And those who are underweight may need to continue the full-fat milk a bit longer.
9. Don’t Give Your Baby Honey Before 1 Year of Age.
Why? Because of the concern for infant botulism.
What’s That? It’s a rare neurological disorder characterized by a weak cry, a floppy body, constipation, poor feeding, and trouble breathing. Get Wise(r) about Infant Botulism here.
Bonus Tips:

- Be Mindful of the Size and Texture of the Foods You Offer Your Child and Do Your Best to Avoid Choking Hazards (Such as Popcorn, Nuts, and Hard Candy Until They’re 4 Years Old). Get Wise About the Top 10 (Food) Choking Hazards for Kids Here.
- Introduce “Allergenic” Foods (Foods Known to Cause Allergies) to Your Baby’s Diet Early On.
Why? To reduce their risk of developing allergies. (Yup! This is a thing.)2 Examples of allergenic foods include watered-down peanut butter and eggs.
Get Wise About How to Safely Introduce “Allergenic” Foods to Your Baby’s Diet Once They Start Solid Foods.
The Bottom Line
You’ll probably get a ton of well-meaning advice about how to feed you baby during their first year of life. You should be in good shape, though, if you keep it simple and stick to the guidelines above.
Getting a Plan in Place: Breastfeeding or Formula Feeding? That is the Question.

The First Step in Feeding Your Newborn is to Decide WHAT to Feed Them. The Two Initial Options (Before Adding Solid Foods at 4-6 Months) Are Breast Milk and Formula.
The American Academy of Pediatrics is a big fan of breastfeeding and you’ll hear many doctors say, “breast is best.”
Why is Breastfeeding Such a Hot-Ticket Item in the Medical World?
Because it has proven benefits for both Mom and baby.
Tell Me More…
The Breastfeeding Benefits for Mom:
- Breastfeeding is cheaper than formula and requires no preparation time (the pump is already primed and ready to go).
- Moms who breastfeed have a lower risk of breast cancer, ovarian cancer, high blood pressure, and Type 2 diabetes down the road (vs. Moms who don’t breastfeed).3
- The body burns an extra 450-500 calories per day when it produces breast milk. This added perk allows for a faster return to pre-pregnancy weight.

“Have a Nice Workout Without the Exercise!”
The Breastfeeding Benefits for Baby:
- Experts at the AAP believe that breast milk provides the best nutrition for babies.
- In addition, breastfed babies have a decreased risk of “sudden infant death syndrome” (the sudden and unexplained death of a seemingly healthy baby under 1 year of age while asleep), diabetes, childhood cancers (namely leukemia), and childhood obesity when compared to their formula-fed counterparts.4
- Perhaps, the coolest thing about breast milk is that it contains antibodies, which boost babies’ immune systems and help protect them against certain viruses and bacteria. Studies show that breastfeeding leads to a reduction in childhood respiratory illnesses, ear infections, gastrointestinal infections, and allergic diseases such as asthma and eczema.
When Breastfeeding is NOT the Best Choice:

There are Only a Few Situations in Which Doctors Advise Women NOT to Feed Their Babies Breast Milk. These Include:
1. Mom is HIV-Positive.
2. Mom is Infected With HTLV-1 or HTLV-2 (T-Cell Lymphotropic Virus Type 1 or Type 2).
What are Those? HTLV-1 and HTLV-2 are two rare retroviruses (viruses that insert themselves into the cell’s DNA so they can replicate). These viruses are tricky because they can hang out in the body without producing any symptoms.
3. Mom is Abusing Street Drugs or Alcohol.
4. Mom is Receiving (“Antimetabolite”) Chemotherapy or Radiation Therapy.
5. The Baby Has Been Diagnosed with Galactosemia.
What’s Galactosemia? It’s a metabolic disorder that prevents babies from breaking down galactose, a sugar found in breast milk. This condition is typically picked up by the newborn screen blood test (which is performed on all babies at birth). The results of this test come back around 2 weeks of age. If the newborn screen comes back positive for galactosemia after Mom has already started breastfeeding, then she’ll be asked to discontinue breastfeeding and switch her baby to a special formula.
There are Also a Few Situations In Which Mom May Need to Temporarily Suspend (or Delay) Breastfeeding (But Not Give It Up Entirely). These Include:
1. Mom is Having a Herpes Outbreak and Has Lesions on Her Breast.
2. Mom is Infected With Untreated Brucellosis (a Rare Bacterial Disease).
3. Mom Has Untreated Tuberculosis.
Breastfeeding can start (or resume) 2 weeks into the TB treatment.
Insider Info: In addition, certain medications and diagnostic imaging techniques require Moms to delay the start of breastfeeding (or to take a break from it).
The Bottom Line: The vast majority of women get the green light when it comes to breastfeeding. If you have any of the absolute contraindications described above go the formula route (or look into donor breast milk).
What’s Donor Breast Milk? It’s expressed (i.e. pumped) breast milk that’s donated to “milk banks” by lactating Moms.
What If I Want to Go the Formula Route? Will I Be Shunned by Society?
No. There’s a lot of noise and weird judgment around this topic, but it’s a personal decision and frankly none of anyone’s business (except for maybe your pediatrician’s).

If you decide to feed your baby formula, choose one that contains iron (most do) and Get Wise below about the different types of formula on the market.
The Bottom Line
Most doctors recommend giving babies breast milk (because of its proven benefits), but the decision is ultimately up to you.5 Breastfeeding can be challenging in the beginning, but it gets easier with practice.
Ok. The Decision Has Been Made. Now What?
Once You’ve Decided to Either Breastfeed Your Baby or to Give Them Formula (or to Offer a Combo of the Two), It Becomes a Choose-Your-Own-Adventure Story.
The 411 on Breastfeeding

Despite what the movies show, breastfeeding can be a challenge and a source of stress for Moms. Moms often feel “like a failure” if the breastfeeding process isn’t easy breezy. Everyone’s experience is different, so treat yourself kindly and know that there’s a learning curve (for both you and your baby) when it comes to breastfeeding. As with learning anything new, learning to breastfeed takes practice and patience. Lucky for you, you’ll be getting a lot of practice breastfeeding because newborns have to feed every 2-3 hours.
Here is Some Basic Breastfeeding Info to Get You Started:
- The first milk that you’ll produce is called colostrum. It’s yellow (sometimes even orange) and is thicker than regular (mature) breast milk. In pediatric circles, colostrum is known as “liquid gold” because it contains nutrients, antibodies, and even a mild laxative to help your baby poop and get rid of the bilirubin (the stuff that causes jaundice – a yellowing of the skin and the whites of the eyes).
- Around Day 3 postpartum, you’ll start producing transitional milk (instead of colostrum), and by the end of the first week of your baby’s life, your milk will become the standard, white breast milk.
- Here’s the Basic Feeding Schedule for the First 2 Weeks of Life:
During the first two weeks (or so) of your baby’s life, you’ll need to feed them every 2-3 hours. That’s 8-12 feedings per day.
Reality Check: Feeding your baby every 2-3 hours (on a set schedule) means that you’ll need to wake them up to feed AND feed them even if they don’t seem all that interested.
In addition to feeding your baby, keep track of their “ins & outs.” This is DocTalk for how much your baby feeds & when (INs) and the number of pees & poops they have (OUTs).
By 2 Weeks of Age, your baby should be back up to their birth weight. As you may remember, all babies naturally lose weight after birth and (ideally) regain it by 2 weeks of age.
From 2-4 Weeks: If your baby is back up to their birth weight at 2 weeks and the feeding is going well, the pediatrician may allow them to feed “on demand” (i.e. when they want to). This will probably mean that you’re feeding your baby every 2-3 hours during the day and every 4 hours (or so) at night.
In addition, the pediatrician may tell you that it’s ok to stop recording your baby’s ins & outs and to merely ballpark them in your head.
- As you get to know your baby, you’ll start to recognize their “hunger cues.” These may include:
- Increased alertness.
- Sucking on their fists.
- Smacking their lips.
- Rooting (turning their head and opening their mouth in search of food).
- Fussiness (in some cases).
Double Take: Not all fussiness means hunger. Crying is a baby’s main mode of communication, so fussiness may just mean that your little one is tired, bored, has a wet diaper or is trying to blow off some steam. Crying tends to be a “late” sign of hunger.
Party Trick:

Pass your baby over to one of your bachelor friends and watch the rooting (i.e. trying to find a nipple) begin. It’s good clean fun for everyone!
Ok. Now That You That Know About Breastfeeding Schedules and Hunger Cues, You May be Wondering How Exactly One Goes About Breastfeeding.
Here are the 3 Main Breastfeeding Steps:
Step 1: Find a Comfortable Position.
Early on, breastfeeding will probably feel a bit awkward as you try to find a comfortable position and attempt to get your baby to latch onto your nipple. Remember, there’s a steep learning curve for both you and your baby, so be kind to yourself.
The first step is to find a “hold” that feels right to you. There are several options when it comes to breastfeeding positions and it will probably take multiple tries to find the one (or two) that work best for you. Here’s a picture of the most common breastfeeding positions.

Insider Info:
- Many women start off trying the cradle position or the cross-cradle position (they’re different in terms of which arm is on the bottom) and the football hold. You may end up using different positions, depending on the day.
- Because newborns are tiny, floppy and wiggly, women will often use a nursing pillow, such as the Boppy Pillow or the My Brest Friend Pillow, to better support their little one’s body during the breastfeeding sessions.
- PediaTip: Though tempting, avoid bending over your baby when you feed them. Instead, lean back and lift your baby to your breast (with the support of a breastfeeding pillow). Why? To save your back!
Step 2: After You’ve Picked the Hold That You Want to Go With, Take the Time to Get a “Good Latch.”
The latch is the way that your baby takes your nipple and the surrounding areola (the pigmented skin around your nipple) into their mouth. A proper latch is key and helps prevent sore and bleeding nipples.
You want the latch to be deep enough so that your baby has your entire nipple and areola in their mouth.
Here are 2 Pictures of a Thumbs-Up Latch:
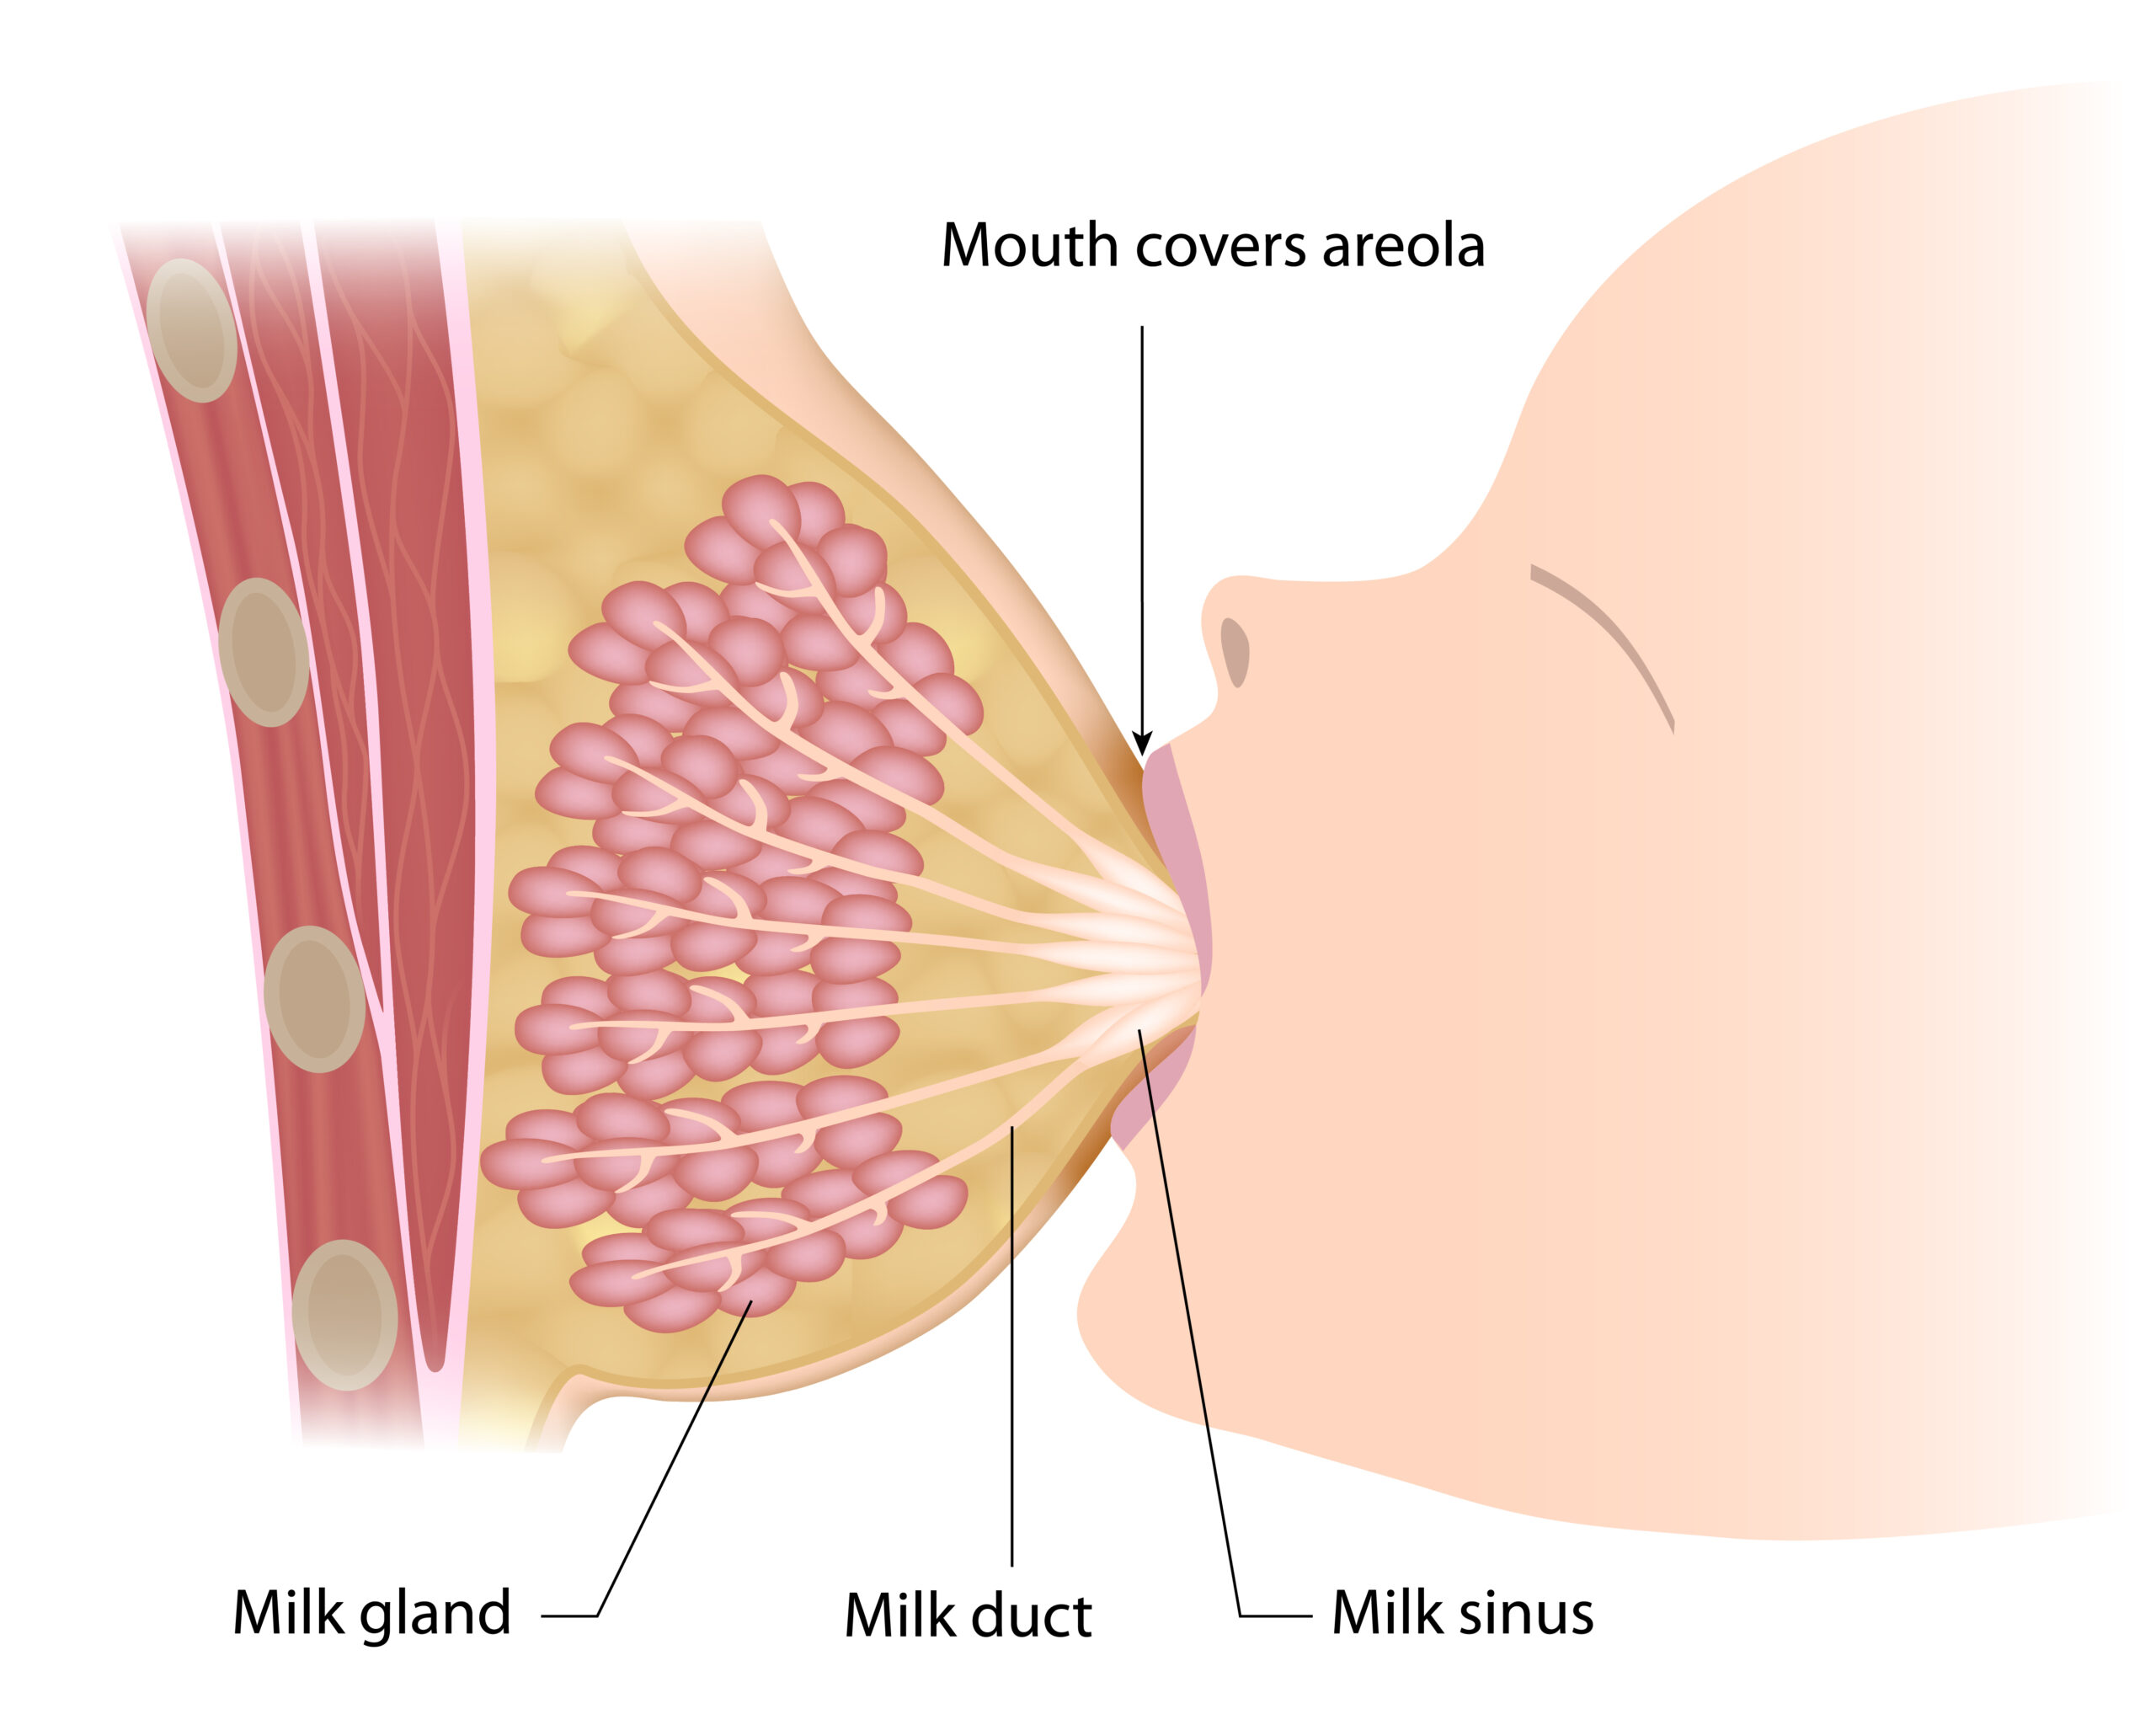

To help your baby get a good latch, pretend that your breast is a sandwich that you want your baby to take a big “bite” out of. To to this, place your thumb above your nipple and your 4 fingers below your nipple (forming a “C” with your hand) and squeeze (softly). This will flatten your breast out and make it easier for your baby to latch onto your nipple. Then, stroke your baby’s nose with your nipple. This will entice them to open their mouth wide. When your baby does open their mouth, (gently) shove your nipple (and your areola) into it.
Insider Info: If you’re using the “cross-cradle” position, hold your breast with your free hand in a vertical “U” position, with your thumb on one side of your nipple and your 4 fingers on the other side. See how the woman in the picture below is using her free hand to gently squeeze her breast?

PediaTip: Avoid the Dreaded Shallow Latch.
A shallow latch is a latch in which your baby only takes the nipple into their mouth and not much (or any) of the areola.
If your baby’s latch is only so-so, detach them from your breast (put your finger in the side of their mouth to break the seal) and try again. After a few days of doing this, your baby will get the memo about what an appropriate latch is.
3. Feed Your Baby for a TOTAL of 20-30 Minutes Per Feed (10-15 Minutes on Each Side). Don’t Be a Hero and Breastfeed for Hours on End.
Why? Because nursing Moms get the most bang for their buck after 20-30 (total) minutes of breastfeeding (i.e. 10-15 minutes per breast). After the initial 20-30 minutes, babies tend to diddle around and use Mom’s nipple as a pacifier (ouch!).
PediaTip: If your baby falls asleep with your nipple in their mouth, you can gently disengage them from your breast and snuggle a bit longer or put them in their crib.
Once your baby gets the hang of nursing, (after a month or so), they’ll become very efficient at it and take only 10-15 minutes total to feed.
Insider Info: Believe it or not, breastfeeding is a workout for babies! For them, it’s like climbing a flight of stairs. That’s why they often conk out after feeding or go into a “milk coma.” Your baby may get sweaty when they breastfeed too. This is usually because of the heat the two of you generate when cuddling skin-to-skin.
Symptom Alert: If your baby gets sweaty during breastfeeding AND they seem out of breath or their lips are turning blue while they feed, let the pediatrician know. Why? Because this can be a sign of an underlying problem (namely of a heart or lung issue). Reality Check: These problems, are rare.
The Bottom Line: Use the tips above to help you get started down the right path on your breastfeeding journey. And remember, learning how to breastfeed can take a little while, so give yourself (and your baby) some time to get the hang of it. If you and your baby are really struggling with breastfeeding, reach out to a lactation consultant (your baby’s pediatrician should be able to recommend one). Some lactation consultants will even come to your house. Score!
Want to Get Even Wiser About Breastfeeding? Check Out These Articles:
- The Top 10 Questions Moms Have About Breastfeeding.
- The Top 5 Breastfeeding Challenges & Complications. (Think: Mastitis—a Breast Infection—and Flat or Inverted Nipples.)
- The 411 on Expressing (i.e. Pumping) Breast Milk.
- Guidelines for Storing Expressed Breast Milk and Formula.
- Tips for Breastfeeding Twins and Premature Babies.
The 411 on Formula Feeding
The first commercial baby formula was developed and marketed in the late 1800s. Over the years, baby formulas have become more sophisticated and more similar to breast milk. Although the American Academy of Pediatrics (the AAP) recommends breastfeeding over formula-feeding (whenever possible), formula is a good alternative for women who are either unable to breastfeed or who prefer not to.
Below, We’ll Discuss:
Get Wise(r) About These Topics Below…
The Different Types of Formula
There are 3 Main Types of Formula. They Include:
1. Milk-Based Formulas.
- Milk-based formulas are the most popular type of formula.
- Examples of milk-based formulas include Similac Advance Infant Formula, Enfamil NeuroPro Baby Formula, and Earth’s Best Organic Infant Formula.
2. Soy-Based Formulas.
- Soy-based formulas are lactose-free and contain soy protein instead of cow’s milk protein.
- Soy-based formulas are a good option for vegan families and for infants who are allergic to (or intolerant of) milk-based formulas.
Insider Info: 8-14% of babies with a milk allergy have a soy protein allergy, as well.5
- Examples of soy-based formulas include: Similac Soy Isomil Formula, Enfamil ProSobee Formula for Sensitive Tummies, and Gerber Good Start Soy Formula.
PediaTrivia:

20% of infants in the U.S. drink a soy-based formula (but often with no clear-cut reason).6
3. Hydrolyzed (or Hydrosylate) Formulas and Amino Acid-Based (aka Elemental) Formulas.
- Hydrolyzed and amino acid-based formulas are both “hypoallergenic” formulas. This means they’re made specifically for infants who have a true allergy (or a severe intolerance) to the proteins found in cow’s milk and soy milk.
Reality Check: You won’t know if your baby has a true allergy to these proteins until they’re born and they have a reaction to cow’s milk OR soy milk.
- Hydrolyzed formulas still contain milk proteins but these proteins have been “broken down” so much that the baby’s immune system doesn’t treat them as an allergen.
Examples of hydrolyzed formulas include: Alimentum and Nutramigen.
- Amino acid-based formulas do NOT contain milk proteins and are, therefore, even more “hypoallergenic” (i.e. they’re even less likely to cause an allergic reaction) than hydrolyzed formulas.
Neocate is an example of an amino acid-based formula.
- Hydrolyzed formulas and amino acid-based formulas are are both pricey and taste awful, but babies don’t seem to care about either issue.
The Bottom Line: If you decide to give your baby formula and your family isn’t vegan, start with a milk-based formula with iron.
Not Only are There Different TYPES of Formula, But There are Different FORMS of Formula. The Most Commonly Used FORMS are: Powered Formula, Liquid Concentrate Formula, and Ready-to-Feed Formula. Get Wise(r) About These Different Options Below.
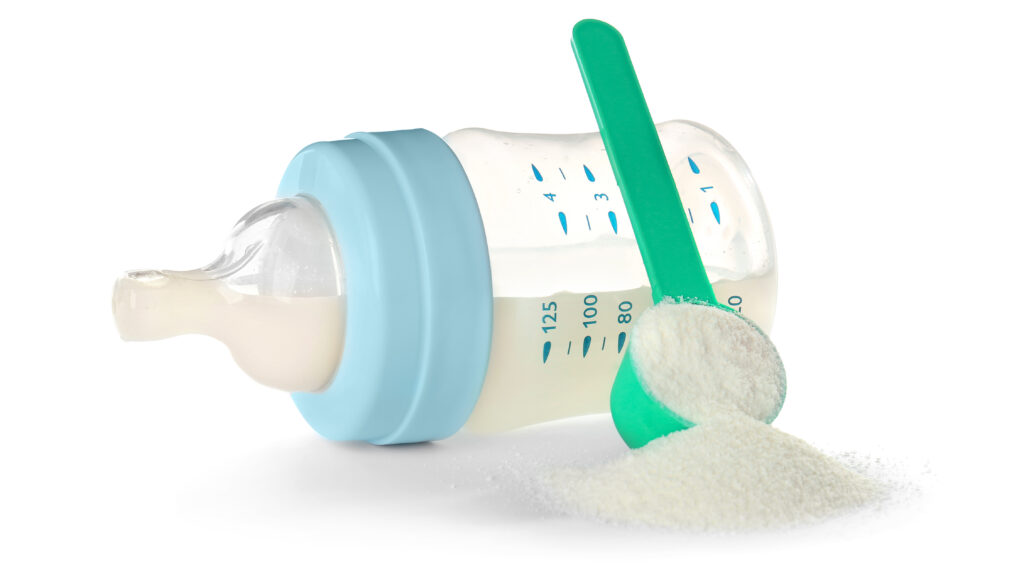
1. Powdered Formula.
- Powdered formula is the most commonly used form of formula. It’s also the cheapest.
- All you have to do is mix the powdered formula with water and, voilà, you have a meal!
2. Liquid Concentrate Formula.
- Liquid concentrate formulas are easy to mix, but they’re more expensive than powdered formulas.
3. Ready-to-Feed Formula.
- Ready-to-feed formulas don’t require any mixing. Just shake the bottle, twist off the cap, and serve.
- Ready-to-feed formulas are the most convenient of the three, but they’re also the most expensive. They’ll make a dent in your wallet, but they’re great when you’re on the road and you don’t want to deal with mixing your baby’s formula.
Insider Info for Pregnant Mamas-to-Be: You do NOT have to bring your own formula to the hospital when you’re ready to deliver. The hospital will give you formula (probably of the ready-to-feed variety) from their own stash. That being said, if you want your baby to receive a specific brand of formula, ask the hospital staff if they have it beforehand. If not, bring it with you to the hospital.
Formula FAQs

Question #1: Are There Any Special Ingredients That I Should Look for When Choosing a Formula for My Baby?
Formula manufacturers try to create formulas that closely mimic breast milk. Although these companies are getting better at imitating breast milk, Mom’s milk has certain properties that can’t be duplicated (think: maternal antibodies). That being said, formula does have some beneficial ingredients. These include (but aren’t limited to):
1. Iron.
Iron is one of the biggest selling points of formula. Most formulas contain iron, whereas breast milk is notorious for being low in iron.
What’s So Great About Iron?
It’s a key component of red blood cells, which carry oxygen to different parts of the body.
Babies have enough iron stores (from Mom) to get them through their first 4 months of life. After that, their iron stores start to deplete. When this happens, babies need additional iron.
Breastfed babies have to get this extra iron from iron supplements, initially, then through iron-rich solid foods (such as infant cereal). Formula-fed babies, on the other hand, don’t have to worry about becoming iron deficient, because they get enough iron from their formula.
Caveat: Babies who were born prematurely (before 37 weeks) have fewer iron stores than their full-term counterparts. Therefore, they often need an iron supplement even if they’re taking formula.
The Bottom Line: Always buy an iron-fortified formula when going the formula route.
2. DHA & ARA.
DHA (Docosahexaenoic Acid) and ARA (Arachidonic Acid) are two fatty acids that naturally occur in breast milk, but that can be added to formula, as well. Studies show that DHA and ARA enhance brain and eye development (although it’s unclear to what degree).
3. Probiotics.
- Probiotics are all the rage these days.
Why? Because they’re made up of “good” bacteria, which promote healthy digestion.
- Probiotics aren’t an absolute necessity in formulas, but they can be an added perk.
Question #2: Should I Spring For an Organic Formula?
Whether (or not) you buy “organic” formula is a personal preference. Although it makes sense to try to avoid pesticides and added hormones, the AAP doesn’t specifically recommend organic formula over generic formula. See what works best for you and your budget.
PediaTip: If you do “go organic,” make sure that the formula uses lactose as its carbohydrate source rather than something sneaky like corn syrup (code name “glucose syrup solids”), which is basically added sugar.
Question #3: How Do I Mix the Formula That I Select?
It’s important to follow the instructions carefully when mixing formula.
Why? Because mixing formula with too little water or too much water can mess with your baby’s sodium levels and can cause problems (think: seizures).
Here are the “Mixing” Specifics for the Different FORMS of Baby Formula (Powdered Formula, Liquid Concentrate Formula, and Ready-to-Feed Formula):
As mentioned above, both Powdered Formula and Liquid Concentrate Formula must be mixed with water, whereas Ready-to-Feed Formula is ready to go (i.e. there’s no mixing required). Just shake the bottle, pop the top, and serve.
Below are the Generally Accepted Mixing Ratios For Powdered Formula and Liquid Concentrate Formula.
PediaTip: Make sure to read the label on the formula container to ensure proper mixing.
1. Powdered Formula
- Formula to Water Ratio: 1 : 2
- Here’s a Sample Recipe: 1 scoop of powdered formula + 2 ounces of water. Then shake and serve (bon appétit!).
Note: 1 ounce = 30 milliliters, so 2 ounces = 60 milliliters.
- PediaTips:
- Make sure the scoop of powdered formula is level (not overflowing) AND unpacked (i.e. not super compressed and packed down).
- If you have to feed on the run, you can plan ahead by adding the desired number of scoops of powdered formula to a dry bottle. When it’s time for your baby to eat, just add the correct amount of water, shake, and feed.
- Make sure the scoop of powdered formula is level (not overflowing) AND unpacked (i.e. not super compressed and packed down).
2. Liquid Concentrate Formula
- Formula to Water Ratio: 1 : 1
Heads Up: As you can seen, the mixing ratios for liquid concentrate formula and powdered formula are NOT the same.
- Sample Recipe: 1 ounce of liquid formula + 1 ounce of water. Then shake and feed.
Important Things to Know:
- Prepared formula (of any kind) should NOT be left out at room temperature for more than 1 hour. After an hour, it should be discarded. If you plan to refrigerate the formula, you must do so within the hour.
- After your baby has had their fill of formula, any leftover formula in the bottle should be thrown away.
Why? Because it now has your baby’s germs in it (from spit-back).
- Freshly prepared powdered formula can be safely stored in the refrigerator for up to 24 hours, whereas freshly prepared liquid concentrate formula AND open bottles of ready-to-feed formula can be stored in the fridge for up to 48 hours.
Commonly Asked Questions About Mixing Baby Formulas:

Should I Mix my Baby’s Formula With Filtered Tap Water or Bottled Water?
Although we tend to love our bottled water in the U.S., filtered tap water (from a safe source) is actually a better choice for babies because it contains regulated amounts of fluoride.
Bottled water, on the other hand, doesn’t naturally contain fluoride. Even if you see bottled water with added fluoride, it’s still better (and cheaper) to opt for filtered tap water because the amount of fluoride in it is more carefully controlled.
PediaTip: Call your local water company to ask about the quality of the water in your area. If you have iffy tap water or you use well water, ask your baby’s doctor if you should boil the water prior to using it OR just use bottled water.
Speaking of Boiling Water…Should I Boil the Tap Water That I Mix with the Formula?
Whether (or not) to boil the tap water before adding it to the formula is actually a bit of a controversial topic. You’ll see various opinions about this topic online and may even hear doctors give conflicting advice about what to do.
The American Academy of Pediatrics’ Current Recs on This Topic are as Follows:
- If the water you’re mixing with the formula is from a “safe water source as defined by the state or local health department” then you do NOT have to boil the water beforehand.8
- However, if you have any concerns about the safety of your tap water, use bottled water or bring the tap water to a “rolling boil” for 1 minute (no longer) prior to use. Let the water cool for no more than 30 minutes before mixing it with the formula. You can test the temperature of the mixed formula by shaking a few drops of it on the inside of your wrist.
- If your child’s doctor recommends boiling the tap water or bottled water regardless of the safety of your water source, then go with what they say.
- PediaTip: Make sure to sterilize your baby’s bottles before adding any formula to them.
The Bottom Line
The are a ton of different formulas on the market. When it comes down to it, though, they’re all pretty much the same. Most parents start off with a milk-based formula if their baby is healthy and the family isn’t vegan. Make sure to get a formula that contains iron, then pick which form of formula you’d like (for example, a powdered formula that you mix yourself or a ready-to-feed formula that comes pre-mixed).
In addition, be careful when mixing your baby’s formula. Refer to the guidelines above for general mixing instructions, but always make sure to read the directions on the formula container too. In addition, ask your baby’s doctor what type of water (tap vs. bottled, boiled vs. not boiled) they recommend based on where you live.
And Now Let’s Move On to the Final Part of This Article, Starting Solid Foods.

Solid foods are typically introduced between 4-6 months of age as a complement to breast milk or formula. The American Academy of Pediatrics prefers that parents wait until their baby is 6-months-old before they introduce solid foods. Ask your baby’s doctor what they recommend.
PediaTrivia:
40% of parents do NOT listen to their pediatrician’s advice and start feeding their baby solid foods before 4 months.9
What’s the Harm in That? Studies show that introducing solid foods before 4 months of age increases a child’s risk of obesity and Type 1 diabetes later in life.10 In addition, babies who receive solid foods too early on don’t get the nutrients they need for their age.
Get Wise Below About the Nuts & Bolts of Starting Solid Foods (When Your Baby is Ready):
- Clues That Your Baby is Developmentally Ready to Start Solid Foods:
- They have good head control and can “sit with support” (i.e. they can sit in a highchair without toppling over).
- They swallow without choking or gagging.
- They appear to salivate over what you’re eating and watch you intently (and with some jealousy).
- Foods to Avoid Under 1 Year of Age:
- Honey.
Why? Because honey can harbor spores of the bacterium, Clostridium botulinum. Ingesting these spores can lead to infant botulism, a rare neurological disorder characterized by a weak cry, a floppy body, constipation, and poor feeding.
- Foods That Can be Choking Hazards (such as popcorn, whole grapes, raisins, and hard candy, etc.).
- Whole Milk.
Why? Because whole milk lacks several important nutrients that babies under 1 year of age need. Moreover, the early introduction of whole milk can cause infants to develop iron-deficiency anemia (a low number of healthy red blood cells in the body due to low iron levels). And if you needed one more reason, the GI tracts and kidneys of infants aren’t mature enough to handle the cow’s milk.
Insider Info: Cow’s milk alternatives, such as goat’s milk, shouldn’t be given until 1 year of age either. Goat’s milk, in particular, is infamous for causing folate-deficiency anemia in infants.
What’s Folate-Deficiency Anemia? It’s a low number of healthy red blood cells in the body due to low folate levels.
Note: Even though whole milk and cow’s milk alternatives are off the table during the first year of life, other sources of dairy (such as eggs and yogurt) are ok.
- Honey.
Common Question: What’s the Best Way to Introduce Solid Foods to Babies?

The Answer: Every pediatrician has their own tips and tricks about how to introduce solid foods to babies (when they’re ready) and which foods to offer first. In the end, most approaches work just fine, so don’t stress too much about the details.
This is What I Typically Recommend to Patients, But See What Your Baby’s Doctor Recommends, First:
- Put Your Baby in a Highchair and Eat With Them. Babies like to model what their parents are doing.
- Have Your Baby “Come to the Table Hungry.” Don’t let them fill up on breast milk or formula before you offer the solid foods. Why? Because they won’t be as interested in trying new foods or textures.
Note: When your baby reaches 6 months of age, you can offer them a little bit of water (in a sippy cup) to go with their meals (if you want).
- Offer a New SINGLE-Ingredient Food Every 3-5 Days.
Why? Because if your baby has an allergic reaction to one of the foods, you’ll be able to pinpoint which one it is. This is why jarred baby food for 6-month-olds contains only 1 ingredient. Save the multiple-ingredient foods for later, when your baby has tried each of the components.
- Start With Baby Cereal.
Why? Because baby cereals typically contain iron and are unlikely to cause a food allergy. You can mix the cereal with either breast milk or formula. Much of the cereal will end up on the ceiling or on your baby’s bib, so if your breast-milk supply is low, don’t waste your liquid gold on the cereal. Use formula instead.
PediaTip: Make the cereal soupy at first. Then, as your baby gets used to it, thicken the cereal so that it mimics the consistency of applesauce.
- Introduce Vegetables Before Fruits.
Why? Because fruits taste sweeter and therefore, better. Pureed peas may be a tough sell after your baby has experienced the wonders of pureed apples and pears.
- Don’t Be Discouraged If Your Baby Spits Everything Out at First or Doesn’t Seem to Like a New Food. The texture of solid foods is very different from the texture of breast milk and formula. Therefore, don’t be surprised if your baby seems skeptical of solid foods at first. In addition, know that it can take up to 10-15 tries for a baby to like a new food. If your baby isn’t a fan of a food, keep it in the rotation and see what happens down the road.
- Let Your Baby Get Messy With Their Food. This is not the time to be a neat freak or to teach table manners. Why? Because eating is a developmental activity for your child. It’s important, therefore, for your baby to explore the food with ALL of their senses (even if they’re splattering it all over the walls).

- Skip (or Limit) Added Salt and Sugar. A baby’s palate is a “tabula rasa” (a clean slate), so they don’t even know that a Twinkie tastes better than broccoli. What tastes bland to you, won’t necessarily taste bland to your baby.
PediaTip: If you do add a little salt to the food, use iodized table salt (salt that contains iodine).
Why? Because it’s good for the thyroid (a hormone-secreting gland in the neck that’s shaped like a butterfly).
- Know What Textures Your Baby Can Handle For Their Age. The act of chewing and swallowing requires a lot of coordination and is a skill that becomes more sophisticated with time. Your baby will be able to handle only finely pureed foods (“Stage 1 foods”) at first. They will then graduate to chunkier purees, and, finally, to finger foods. If you buy baby food from the store, you’ll see that it’s divided into “stages” based on its thickness and chunkiness.
Insider Info:- If you’re making your own baby food, you can mimic these stages at home. Get Wise about the different stages of baby food (for each age group).
- If you’re planning to try “baby-led weaning” (the somewhat controversial practice of offering bite-sized table foods from the start), Get Wise about it here.
What are Some Single-Ingredient Foods (Besides Baby Cereal) That I Can Offer My Baby (in Pureed Form) to Start?
Examples of Single-Ingredient Veggies, Include:
- Carrots
- Broccoli
- Cauliflower
- Sweet potatoes
- White potatoes
- Squash
- Green beans
- Peas
PediaTrivia: 5% of kids with a peanut allergy are allergic to other legumes (such as peas and green beans), too.11
Examples of Single-Ingredient Fruits, Include:
- Apples
- Pears
- Bananas
- Prunes
- Peaches
- Plums
Examples of Single-Ingredient (Cooked) Meats, Include:
- Turkey
- Chicken
- Beef
- Fish
Insider Info: You may never be the same after you’ve seen what pureed meat looks like.
A Word About Premature Babies:
As mentioned above, eating solid foods requires a certain amount of developmental maturity (a coordinated chew and swallow action). Premature babies don’t usually have these skills until they’ve reached a corrected age (vs. a chronological age) of 4-6 months. If your baby was born prematurely (before 37 weeks), get the green light from their pediatrician before offering them solid foods.
A Reminder About Iron:
Babies’ iron stores become depleted around 4 months of age. Your baby’s iron needs will be covered, though, if:
1. Half or more of their feeds are made up of an iron-fortified formula.
OR
2. They start eating iron-rich solid foods at 4 months (regardless of how much formula they’re taking, if any).
If more than half of your baby’s feeds are made up of breast milk AND your baby waits until 6 months of age to start iron-rich solid foods, the pediatrician will probably recommend that you start giving your little one a daily iron supplement starting at 4-months of age.
The Bottom Line
Ask your baby’s doctor when your little one should start solid foods and what their plan is for introducing them.
Congratulations! You Made It to the End of This Super Long Article (Hopefully in One Piece).

I know I included a ton of details in this First Year Feeding Primer, but don’t worry, most of them were just for your knowledge and the important ones (like avoiding choking hazards) will crop up over & over during your child’s pediatric visits. Feeding your child is a journey and their needs will change over time. Use the tips above to help you successfully feed your little one and remember that the pediatrician is always a phone call away.
And…Breathe…

