Toddler Lessons

Welcome to Month 32 (Week 2) of Parenting Your Toddler!

In This Week’s PediaGuide Article, We’ll Discuss:

Get Wise About It All Below…

This week, we’ll continue our theme of injuries in toddlers by revisiting the topic of cuts and what to do about them. Get Wise (again) about how to clean cuts and when to get them stitched up. We’ll also review the Top 15 Items to Have in Your First-Aid Kit.

Cuts & Stitches

Most Cuts and Scrapes are Minor and Heal on Their Own.

If Your Child Gets a Cut and It’s Bleeding, Do the Following:

1. “Hold pressure” (with a tissue or a piece of toilet paper) to stop the bleeding.

2. Clean the cut with soap and water.

3. Inspect the cut. 

4. After you’ve examined the cut, it becomes a choose your own adventure story based on what the cut looks like: 

  • Option #1: If the cut is minor, apply an anti-bacterial ointment (such as Neosporin) to the affected area and cover it with a Band-Aid.

    Insider Info: Back in the day, doctors recommended “airing out” cuts thinking they healed better and faster when they were left uncovered. Now, studies show that keeping cuts moist and covered is the way to go.1

    PediaTip: Check the cut daily to make sure that it’s not getting infected.
  • Option #2: If the cut looks worrisome, your child may need stitches. In this case, call the doctor.

Medical Attention is Usually Needed in the Following Situations:

  • The Cut is Deep and Gaping. These types of cuts often require stitches.

    Insider Info: The depth of a cut can be hard to assess, so err on the side of caution and call the doctor if you’re not sure. If you see globs of fat oozing out of the cut, you know that it’s deep.
  • You Can’t Get the Bleeding Under Control Despite Holding Pressure for 10-Plus Minutes.
  • The Wound Is in a Tricky Location. Lacerations in the following areas may need to be sutured by a plastic surgeon for cosmetic reasons and to prevent complications.
    • Cuts in the upper part of the ear.
    • Cuts at the hairline.
    • Cuts that run across the eyebrow.
    • Cuts in the nasal septum (i.e. in the bone & cartilage that divides the two nostrils).
    • Eyelid cuts.
    • Cuts through the upper or lower borders of the lip (fancy name: the vermilion borders).

      Note: Cuts on the lip itself don’t usually require stitches.

      Insider Info: It’s rare to need stitches on the tongue or the gums. Why? Because these areas tend to heal well without stitches (unless the tongue is cut all the way through, which it’s usually not).

Other Situations That Typically Require Medical Care, Include Those in Which:

  • The Wound Starts Getting Infected Over Time (i.e. your child spikes a fever or the cut turns red, starts to ooze pus, or becomes more painful).
  • The Cause of the Cut (i.e. the Mechanism of Injury) Makes It More Likely That the Cut is Going to Get Infected (i.e. That it Will Become a “Dirty” Wound). Animal bites, human bites, and cuts from a rusty nail are all considered “dirty” wounds.
  • Your Child’s Immunizations Aren’t Up To Date. In this case, your child may need a tetanus booster.

    Not Sure If Your Child’s Tetanus Series is Current (or Adequate)? Ask their doctor. Know too, that kids usually get tetanus shots at 2 months, 4 months, 6 months, 15 months, and again at 4 years. They get an additional tetanus booster shot at 11-12 years and a tetanus booster every 10 years after that.
    • For “clean” wounds, a tetanus booster is recommended if the child has gotten fewer than 3 doses of the tetanus vaccine OR if the most recent tetanus shot was administered 10+ years ago.
    • For “dirty” wounds, a tetanus booster is needed if the child has gotten fewer than 3 doses of the tetanus vaccine OR it’s been 5+ years since the last tetanus shot.

PediaTip: If you’re concerned about your child’s cut, don’t wait to seek treatment. Why? Because it’s best to get stitches within 12 hours of injury, ideally within 6-8 hours. After that, the risk of infection goes way up.

If the doctor thinks your child needs stitches based on the clues above, they’ll tell you where to go.

The Options Are: The doctor’s office, a plastic surgeon’s office, the ER, or an urgent-care center (that has doctors well-versed in pediatrics).

Getting Stitches

Before stitching a child up, the doctor will clean the wound thoroughly, numb the area with a local anesthetic (such as injectable Lidocaine), then put the stitches in with a medical needle and thread.

As you can imagine, toddlers hate all of this. The biggest challenge will be keeping your child STILL. This is one of the few cases in which bribery gets the thumbs-up. If your child is in total meltdown mode, the doctor may suggest a sedative or an anti-anxiety medication to help calm them down.

FYI: Stitches Aren’t the Only Game in Town.

  • Glue (e.g. Dermabond) and Steri-strips (butterfly bandage closures) can be used for small, straightforward cuts.
  • Staples are commonly used for cuts on the scalp. Although head wounds tend to bleed a lot, only a few staples are usually needed to close them. Don’t worry, the doctor isn’t pulling out an office stapler for this; a fancy staple gun is used instead. Putting staples in a child’s head may sound kind of barbaric, but they go in fast and do the job well.

Common Questions About Stitches:

Few Kids Escape Childhood Without Needing at Least a Few Stitches. Here are the Top 3 Questions Parents Tend to Ask About Them:

1. Do Stitches Dissolve on Their Own?

Some of them do. Your child’s doctor (or the ER doctor) will tell you what type of suture material they used to repair the cut. 

2. When Will the Stitches be Removed?

It depends on the location of the cut and what type of stitch material was used. 

If the stitches are dissolvable, they don’t have to be removed (and will dissolve on their own). In this case, you don’t have to do anything except watch for signs of infection.

If the stitches are not dissolvable, then location matters. For example, stitches on the face are typically removed after 5 days, whereas stitches in the leg, are taken out after 8-10 days. Ask the doctor when your child should return to have the stitches removed and who will do it (the general pediatrician or the ER doctor)?

3. Can Stitches Get Wet?

Non-dissolving stitches should be kept dry and covered for the first 48 hours. 

Dissolvable stitches must be kept dry longer.

Ask the doctor what they recommend based on your child’s specific case.

Bonus Question: Will My Child Have a Scar?

The answer to this question depends on the severity of the cut, where it is on the body, and how well the stitches are cared for. 

Tips for Minimizing Scarring Include:

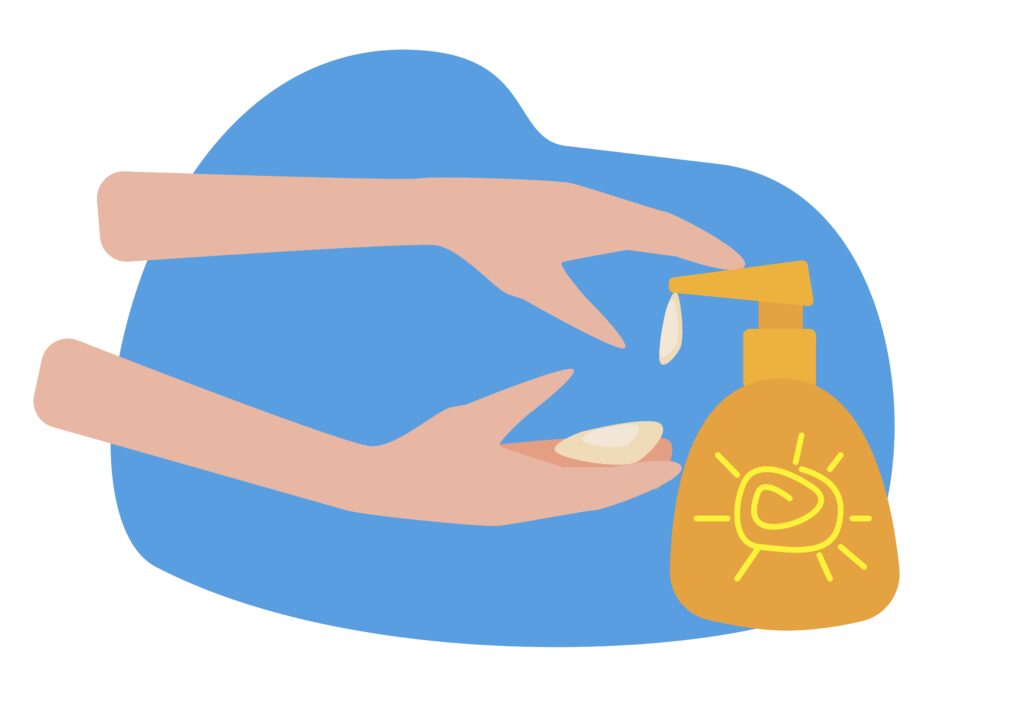
  • Apply sunscreen to the area daily, after the wound has healed. Do this for (at least) the first year after the injury, even during the winter.
  • Try a scar-minimizing cream like Mederma, which is sold both online and over the counter at your local drugstore. Get the green light from the doctor before using it, though.
  • Follow-up with the doctor as instructed. 

    Why? Because leaving the stitches in for too long can result in suboptimal healing.

The Bottom Line: Most cuts in kids aren’t serious. That being said, call the doctor (or head to the ER) if you think your child needs stitches.

A Review: The Top 15 Items to Have in Your First-Aid Kit

Cuts, Scrapes, and Falls Are an Inevitable Part of Growing Up. To Help You Prepare for Them, Here are the Top 15 Items to Include in Your First-Aid Kit.

1. Band-Aids (of varying sizes).

2. Elastic Wrap Bandages.

3. Athletic Tape.

4. An Instant Cold Compress (aka an ice pack).

5. Alcohol Wipes (to clean cuts and remove residue from Band-Aids and athletic tape).

6. Hydrogen Peroxide (you can pour hydrogen peroxide on cuts to disinfect them).

7. Eyewash Solution.

8. Vaseline.

9. Neosporin (an anti-bacterial ointment for cuts and scrapes).

10. Calamine Lotion (to help with itchy rashes, like poison ivy).

11. Acetaminophen (e.g. Tylenol) and Ibuprofen (e.g. Motrin and Advil).

12. Benadryl.

Note: Benadryl is typically reserved for children 2 years & older when it’s used for (minor) allergic reactions. When it’s used as a decongestant, Benadryl is often limited to kids 6 years & older (unless the doctor says otherwise). If your child has an Epi-Pen, add it to the kit as well.

13. 1% Hydrocortisone cream (a steroid cream).

14. A Thermometer.

15. Scissors and Tweezers.

The Bottom Line

Call the doctor if your child’s cut or injury requires more than what’s in your first-aid kit.

“Marriage is mostly just sending
each other memes while your kids
destroy the house around you.”

~James Breakwell

The Reminders for This Week are the Same as Last Week’s. Get Wise About Them Below…

  • Limit Your Child’s Whole Milk to 16-20 Ounces Per Day (Starting at 2 Years of Age).
  • Feed Your Child What You Eat, But Cut Into Bite-Sized Pieces.
  • Steer Clear of Choking Hazards. Get Wise About the Top 10 (Food) Choking Hazards Here.
  • Brush Your Child’s Teeth Twice a Day (Especially After the Last Meal of the Night) and Have Them Visit the Dentist Every 6 Months (Unless the Dentist Says Otherwise).
  • Call the Doctor If Your Child Spikes a Fever Above 102.2°F OR If They Develop Any Other Worrisome Symptoms (Such as Lethargy or Poor Feeding).
  • Continue to Give Your Child a Daily Vitamin D Supplement (600 International Units Per Day).
  • Keep Your Child in the Rear-Facing Position in Their Car Seat Until They Exceed the Height and Weight Restrictions Outlined by the Manufacturer.

And…That’s a Wrap!

Welcome to Month 32 (Week 1) of Parenting Your Toddler!

In This Week’s PediaGuide Article, We’ll Discuss:

Get Wise About It All Below…

At this point, your toddler is probably a curious, chatty, and resilient busy bee. They may be entering the preschool world, using the potty, and getting their growth on.

Speaking of Growthkids are able to grow taller because of the growth plates in their bones.

What the Heck are Those? Growth plates are areas of cartilage at the ends of each bone. They’re important because they allow bones to grow longer. After a child goes through puberty, their growth plates fuse, signaling that they’re done growing.

Doctors are super protective of growth plates and get all worked up if something like a bone break (aka a fracture) threatens to disrupt them. Why? Because a fracture of the growth plate can cause the affected limb to grow improperly and appear crooked or shorter than the unaffected limb.

Although broken bones aren’t super common in toddlers, they need to be treated and managed by an orthopedic specialist (aka a bone doctor).

Fractures in Kids

There are 2 Main Types of Fractures in Kids:

1. Simple Fractures (aka “Closed Fractures”): Simple fractures are straightforward breaks in the bone. When there’s a simple fracture, the skin remains intact (meaning the broken bone doesn’t come through the skin).

2. Compound Fractures (aka “Open Fractures”): Compound fractures are bad breaks in which the end of the broken bone pokes through the skin. This type of fracture looks pretty gnarly and has a greater risk of getting infected than a simple fracture. Compound fractures must be treated with surgery.

Insider Info: A “displaced” fracture is a fracture in which the pieces of the fractured bone don’t line up properly. Displaced fractures can be either simple fractures or compound fractures.

You Mentioned Something About Growth Plates and Fractures. Tell Me More…

As discussed above, each bone has 2 growth plates (one on either end), which enable the bone to grow longer. 15-30% of childhood fractures involve the growth plate.1 However, the majority aren’t serious and don’t interfere with the growth of the affected body part.

Insider Info:

  • The “Salter-Harris Fracture Classification System” is a fancy rating scale that ranks growth plate fractures by severity.
  • A Salter-Harris Type 1 fracture represents a minor growth-plate fracture, whereas a Salter-Harris Type 5 fracture is the most severe. Fortunately, Salter-Harris Type 5 fractures aren’t all that common.
  • If your child breaks a bone and the fracture goes through the growth plate, the doctor will let you know. This info won’t necessarily change the way the doctor manages the fracture, but it will dictate how careful your child needs to be during the healing process (and how psycho you need to be about shadowing them). As you can imagine, it’s often tough for toddlers (even ones with broken bones and casts) to follow the rules and take it easy during the recovery process.

What are the Symptoms of a Fracture?

If your toddler takes a spill and cries and holds their arm or leg afterwards, you may start to worry about a broken bone. It can be tough, however, to tell the extent of a musculoskeletal injury just by looking at the limb. Here are a few tips to help you determine when an X-ray may be necessary.

The Top 6 Signs That Your Child May Need an X-Ray:

1. They Have Prolonged Crying and Pain. 

Expect your child to cry after an injury, but don’t expect the crying to go on and on.

2. They Refuse to Move the Limb.

Insider Info: Kids are sometimes afraid to move their injured limb because they “remember” the pain they felt when they hurt it and don’t want to revisit that pain. Without forcing it, try to distract your child or give them a fun incentive to use the affected limb. If they still refuse to use it, you may have a fracture on your hands.

3. They Refuse to Walk or They Limp When They Walk.

4. They Have Major Bruising and Swelling at the Site of the Injury.

5. They Have a Limb That “Looks” Broken (i.e. That’s at a Weird Angle After the Injury).

6. They Had a “Mechanism of Injury” That Often Results in Broken Bones.

For example, falling on an outstretched hand while trying to break a fall is a common cause of wrist fractures in kids.

Insider Info: If a child 2 years (or older) hurts their ankle, the doctor will use the “Ottawa Ankle Rules” to determine if they need an X-ray. These rules take into account the location of the pain and the child’s ability to bear weight on the injured ankle.

In Addition to the Above Symptoms, There are Certain Signs That Doctors Look For on the Physical Exam to Help Them Determine If a Bone is Fractured (and Needs an X-Ray).

These Signs Include:

  • Swelling.
  • Tenderness.
  • Deformity (i.e. the limb looks crooked).
  • Poor circulation (i.e. the pulses are weak and hard to feel).
  • Crepitus (i.e. there’s a crackling sensation under the skin that feels like pressing on bubble wrap. Crepitus is a sign that air is trapped in the tissue beneath the skin).

How are Fractures Diagnosed?

The Answer: With an X-ray of the affected body part.

Insider Info:

  • Fractures (especially fractures involving the growth plate) can take a while to show up on an X-ray. If your child is still complaining of pain after a negative X-ray, let the doctor know. In this case, your child may need a repeat X-ray or require a higher-resolution image (such as a CT scan or an MRI) to make sure there isn’t a hidden fracture.
  • X-rays are pretty good at diagnosing bone breaks. MRIs are best for soft-tissue injuries (which can present the same way as a fracture).

How are Fractures Treated?

If the X-ray shows a fracture (or a fracture is suspected even though the X-ray is negative), the pediatrician (or the ER doctor) will refer your child to an orthopedic (bone) surgeon.

  • If the fracture is minor, the orthopedic surgeon may just recommend a cast. Orthopedic surgeons often wait a few days for the swelling to go down before “casting” a broken bone. A splint can be applied in the meantime to keep the affected limb stable. The type of break determines how long the cast needs to stay on.
  • If the fracture is “displaced” (i.e. if the pieces of the fractured bone don’t line up properly), the ends of the bone may need to be realigned (without surgery) before the cast is put on. The realigning process hurts like a mother and is often done in the Emergency Department after giving the patient a sedative, such as intranasal Versed (which goes up the nose).
  • If the fracture is severe, surgery under anesthesia may be needed.

PediaTips for Cast Care

  • Casts are made out of plaster or fiberglass. Fiberglass casts are lighter and more durable than plaster casts. They also come in different colors, which is a nice perk.
  • Resist the temptation to put a pencil or a spoon down your child’s cast to relieve an itch.

    Why? Because putting an object down there can mess with the padding inside, leading to increased pressure on the skin and possible skin breakdown (read: a wound).
  • Use a cast cover or plastic wrap for baths and showers.
  • Draw something fun on your kid’s cast.
  • Periodically evaluate the injured body part after the cast has been put on. For example, make sure your kiddo’s pain isn’t worsening and they can still wiggle their fingers or toes (depending on the location of the cast).

    Why? Because docs are always on the lookout for compartment syndrome, a rare complication that can occur when a cast is too tight.

Tell Me More About “Compartment Syndrome”…

Compartment syndrome is caused by a buildup of pressure inside one of the enclosed muscle spaces under the cast. The increased pressure is caused by swelling or bleeding into the compartment where the muscles are located. The elevated pressure can slow the blood supply to the muscle and nerve cells, leading to serious problems.

What are the Symptoms of Compartment Syndrome? 

Compartment Syndrome is Characterized by the 5 Ps:

1. Pain: Severe pain “out of proportion” to how the affected body part looks (i.e. it may seem like your child is being super dramatic about the pain when they’re not).

2. Pallor: Pale skin.

3. Paresthesia: Numbness and tingling.

4. Pulselessness: Diminished or absent pulses.

5. Paralysis: Trouble moving the affected limb (this is a late finding).

How is Compartment Syndrome Diagnosed?

If the orthopedic surgeon suspects that a child has compartment syndrome, they’ll stick a pressure gauge (i.e. a big *ss needle) into the affected limb to see if there’s a buildup of pressure inside the muscle compartment.

Note: This does not feel good.

How is Compartment Syndrome Treated?

With immediate surgery (to relieve the pressure).

The Good News: Compartment syndrome is rare. Still, it doesn’t hurt to be on the lookout for it.

The Bottom Line

Doctors are especially cautious about bone fractures in kids because of their growth plates. Although most injuries in toddlers don’t result in broken bones, it’s worth calling the doctor if you’re worried about a possible fracture.  

“’Mommy, watch this!!!’ is the toddler
equivalent of ‘hold my beer.’
It means something stupid &

dangerous is about to take place.”

~My Merry Messy Life

The Reminders for This Week are the Same as Last Week’s. Get Wise About Them Below…

  • Limit Your Child’s Whole Milk to 16-20 Ounces Per Day (Starting at 2 Years of Age).
  • Feed Your Child What You Eat, But Cut into Bite-Sized Pieces.
  • Steer Clear of Choking Hazards. Get Wise About the Top 10 (Food) Choking Hazards Here.
  • Brush Your Child’s Teeth Twice a Day (Especially After the Last Meal of the Night) and Have Them Visit the Dentist Every 6 Months (Unless the Dentist Says Otherwise).
  • Call the Doctor If Your Child Spikes a Fever Above 102.2°F OR If They Develop Any Other Worrisome Symptoms (Such as Lethargy or Poor Feeding).
  • Continue to Give Your Child a Daily Vitamin D Supplement (600 International Units Per Day).
  • Keep Your Child in the Rear-Facing Position in Their Car Seat Until They Exceed the Height and Weight Restrictions Outlined by the Manufacturer.

And…That’s a Wrap!

Welcome to Month 31 (Week 4) of Parenting Your Toddler!

In This Week’s PediaGuide Article, We’ll Discuss:

Get Wise About It All Below…

Toddlers, as we all know, can be daredevils. They like to jump off couches, hurl themselves down slides, and run around like maniacs. This week, we’ll continue our discussion of bumps and bruises in kids and how to manage them.

But First, a Word About the Toddler Diet, Sleep & Doctor’s Visits: Keep doing what you’re doing when it comes to your toddler’s diet and sleep (as long as it’s working for you). The next formal checkup won’t be until age 3 and the next round of vaccines (except for the yearly flu and COVID shots) will be given at age 4.

Now, Let’s Check Out the Hot Topics for the Week…

Bruising in Kids (Revisited)

As you may remember, most bruises in kids are normal and are nothing to worry about. Toddlers are always bumping into things and taking tumbles, so we expect a certain amount of bruising, especially in “high trauma” areas like the forehead, shins, knees, and elbows. 

What Docs Worry About: In rare cases, bruising can be caused by a low platelet count (which leads to blood-clotting issues) or another bleeding disorder. Doctors also worry about “non-accidental trauma” (the PC word for child abuse) in certain situations.

Red Flags: The Following Signs Tend to Get the Doctor’s Attention When it Comes to Bruising:

1. Bruising in Non-High-Trauma Areas (Such as on the Ears, the Neck, and the Cheeks).

2. A Ton of Bruising in Various Places (More than Normal).

Insider Info: It can be hard to tell what a “normal amount” of bruising is, so ask your child’s doctor what they think.

3. Nosebleeds and Bleeding Gums in Addition to the Bruising.

This might be a coincidence or indicate an underlying bleeding disorder.

4. Petechiae – Small Round Pink or Purple Dots (See Pic Below).

Why Do Doctors Care About Petechiae? Because they signify bleeding under the skin. 

Here’s a Clue That the Dots are Petechiae: Petechiae don’t blanche (i.e. turn white) when you press on them.

5. Bruising in a Child With a Family History of a Bleeding Disorder (Such as Hemophilia).

6. Bruising in an Infant Who’s Not Yet Mobile.

This can be a sign of non-accidental trauma.

7. Any Bruising That You Find Worrisome.

Why? Because it never hurts to be on the safe side.

The Bottom Line:

Call the doctor if you see any of red flag signs for bruising.

A Word About Non-Accidental Trauma (aka Child Abuse)

As mentioned above, bruising in unexpected areas and in infants who aren’t yet mobile, can be signs of non-accidental trauma. Although non-accidental trauma is a cringeworthy topic, pediatricians occasionally see signs of child abuse in their patients or have parents raise concerns about potential abuse.

If you’re worried about non-accidental trauma in your child, book a separate appointment with their doctor ASAP.

Note: Doctors are “mandated reporters,” meaning they’re legally obligated to contact child protective services (CPS) about suspected abuse.

Get Wise(r) About the Top 3 Signs of Non-Accidental Trauma in Kids.

Head Injuries & What to Do About Them

Toddlers tend to bump their heads frequently. Fortunately, most of these head bumps are minor. A common head-trauma scenario that pediatricians see in the office is of a child who trips, hits their head, and then develops a large goose egg on their forehead. Foreheads are actually not a bad place to hit one’s head. It’s worse to hit the side of the head because of the blood vessels running beneath the bones.

If Your Child Ever Experiences Head Trauma, Do the Following:

1. Take a Breath.

2. Determine Whether They Were Knocked Unconscious.

a. If they’re unconscious call 911.

b. If they’re conscious, move on to the next step…

3. Quickly Check for Other Injuries.

4. Call Your Child’s Doctor or the On-Call Doctor. 

Here’s What the Doctor Will Want to Know:

  • What Was the Mechanism of Injury? Did your child fall, get in a car crash, or run into something?

    Insider Info: A fall from a height above 3 feet in children under 2 will typically get the doctor’s attention, as will a fall from a height above 5 feet in children 2 & over.1
  • What Kind of Surface Did Your Child Hit Their Head On (a Hardwood Floor, Carpet, Asphalt, Grass, Etc.)? Carpet and grass obviously make for a softer landing.
  • Did Your Child Cry Immediately or Get Knocked Out? If your child cried immediately, that’s reassuring. If they got knocked out, you need to call 911.
  • How Does Your Child Look Now? Groggy? Lethargic? Back to Normal?
  • Is Your Child Vomiting?
  • Is There Bruising Behind the Ear, Bleeding From the Ear, or Clear Fluid Draining from the Nose? These are worrisome symptoms because they can be a sign that cerebrospinal fluid (the fluid that bathes the brain and spinal cord) is leaking from the skull.
  • Are the Pupils (the Black Part of the Eye) Equal in Size?

    Insider Info:
    Some kids (my daughter included) naturally have different-sized pupils (fancy name: physiologic anisocoria). If the head trauma was minor and everything else seems okay, the different-sized pupils are probably not related to the injury. Regardless, it’s best to let the doctor know about the finding.
  • Are You Worried? No doctor — or anyone else, for that matter — will fault you for erring on the side of caution with a head injury. Doctors are cautious about them, too, so be prepared for the pediatrician to say that your child needs to be seen (either in the office or in the ER).

A Word About “Lucid Intervals”

If your child hit their head and got briefly knocked out, but seems ok, the doctor will still probably want you to bring them to the hospital for observation.

Why? To guard against the rare case of an “epidural hematoma.”

What’s That? An epidural hematoma is a type of bleed in the brain. Patients with an epidural hematoma tend to lose consciousness, then wake up and seem fine (the “lucid interval”), only to become unconscious once again.

While it’s unlikely that your child would ever develop an epidural hematoma after a head injury, it’s worth taking them to the hospital to get checked out if there was any loss of consciousness (no matter how brief).

Common Question: If My Child Falls and Hits Their Head, Will They Need Imaging at the Hospital?

The Short Answer: It depends (on several factors).

The Longer Answer: Back in the day, ER doctors were pretty loose about ordering head CT scans but now they’re more deliberate about it because of the risks associated with radiation (think: cancer). 

Here are the Kiddos Who Typically Qualify for a Head CT Scan in the ER After a Fall:

  • Kids with an abnormal neurological exam (a part of the physical exam performed by the doctor).
  • Kids who seem “altered” (i.e. confused or lethargic) after the head trauma.
  • Kids with bruising behind the ear, bleeding from the ear, or clear fluid draining from the nose. As mentioned above, doctors worry about the leakage of cerebrospinal fluid in this case.
  • Kids who repeatedly vomit or have a seizure after the head trauma.
  • Babies and toddlers with a bulging anterior fontanelle. As you may remember, the anterior fontanelle is the soft spot on top of the head. It naturally closes around 2 years of age. A bulging anterior fontanelle can be a sign of increased pressure in the skull.
  • Kids who lose consciousness for a prolonged period of time after the head trauma or who show signs of an epidural hematoma (a loss of consciousness, followed by a lucid interval, followed by another loss of consciousness).
  • Anyone else the doctor is worried about. ER doctors may have a sixth sense about certain kids, even if they don’t fit the above criteria. For example, docs may also do imaging on the following kids:
    • Babies under 3 months of age.
    • Kids who lose consciousness for 5 seconds or more.
    • Children under 2 years who fell from a height of 3 feet or more and children 2 years & older who fell from a height of 5 feet or more.
    • Kids who were in a car accident. 

In addition, the ER doctor may elect to do a head X-ray on a child who has a tender and swollen area on their head. In this case, the doc is looking for a skull fracture. If a skull fracture is present, the doctor will follow the X-ray with a head CT scan.

Reality Check: If your child ends up needing a head CT scan, don’t worry too much about the radiation. One test won’t break the bank. It’s the cumulative effect of multiple tests that can have a negative impact.

Tips for Preventing Head Injuries:

Head injuries can happen on anyone’s watch, but here are some things you can do to minimize your child’s risk of having a serious one:

  • Create Soft Landings: Carpet the floors that your child plays on (if possible). Consider investing in a “crash mat” (a soft mat that your child can jump onto), as well.
  • Be a Spotter: Spot your toddler while they’re on the jungle gym, jumping on the bed, or trying to launch themselves off the couch.

How to Manage Neck & Back Injuries

Serious neck and back injuries are uncommon in children and are usually the result of big falls or accidents (such as car accidents). Still, it never hurts to know what to do in an emergency situation.

The No. 1 thing to remember with a child who has a potentially serious neck or back injury is not to move them. 

If you’re the parent, this can be tough, because the first thing you want to do is hug and comfort your child. In this case, resist the urge to do so and call 911. When the paramedics arrive, they’ll keep your child immobilized until damage to the spine can be ruled out. Moving a child with a spinal cord injury can make the injury worse & cause permanent nerve damage.

The Bottom Line

Bruises and head bumps are common in toddlers. Fortunately, most bruising and head injuries are minor. That being said, look for the red flag signs mentioned above and call the doctor if you’re concerned about your child’s injury or if you’re not sure what to do next.

“Behind every young child who
believes in himself is a parent
who believed first.”

~Matthew Jacobson

The Reminders for This Week are the Same as Last Week’s. Get Wise About Them Below…

  • Limit Your Child’s Whole Milk to 16-20 Ounces Per Day (Starting at 2 Years of Age).
  • Feed Your Child What You Eat, But Cut Into Bite-Sized Pieces.
  • Steer Clear of Choking Hazards. Get Wise About the Top 10 (Food) Choking Hazards Here.
  • Brush Your Child’s Teeth Twice a Day (Especially After the Last Meal of the Night) and Have Them Visit the Dentist Every 6 Months (Unless the Dentist Says Otherwise).
  • Call the Doctor If Your Child Spikes a Fever Above 102.2°F OR If They Develop Any Other Worrisome Symptoms (Such as Lethargy or Poor Feeding).
  • Continue to Give Your Child a Daily Vitamin D Supplement (600 International Units Per Day).
  • Keep Your Child in the Rear-Facing Position in Their Car Seat Until They Exceed the Height and Weight Restrictions Outlined by the Manufacturer.

And…That’s a Wrap!

Welcome to Month 31 (Week 3) of Parenting Your Toddler!

In This Week’s PediaGuide Article, We’ll Discuss:

Get Wise About It All Below…

As toddlers practice their catching, kicking, throwing, and high(er) speed running, they’re bound to get a few bumps and bruises along the way. For example, they may face-plant into the ground or get hit in the nose or the ear by a ball.

Although noses tend to bleed profusely when hit, nose injuries aren’t usually all that severe. Ears, on the other hand, can be tricky. Your child won’t necessarily be gushing blood if they get hit in the ear, but if a bruise develops, it could mean trouble for the ear’s fragile blood supply.

Get Wise about how to manage nose and ear injuries, below.

Nose Injuries

When a child gets hit in the nose, it can be difficult to tell the extent of the injury. That’s because noses bleed a lot and tend to bleed even more when the child is crying.

Clues That a Nose May Be Broken Include:

  • The nose looks deformed (i.e. it looks swollen and crooked).
  • The nose really hurts, especially in one particular area (i.e. where it’s broken).
  • The child develops two black eyes (this typically happens the day after the injury).

PediaTip: If your child injures their nose, be on the lookout for a septal hematoma, in addition to a broken nose.

What’s a Septal Hematoma?

A septal hematoma is a blood clot that forms within the nasal septum (i.e. within the bone & cartilage that separates the two nostrils). Septal hematomas are rare, but they can occur even with mild trauma. They’re considered a medical emergency and need to be drained ASAP.

The most common symptom seen with a septal hematoma is being unable to breathe through one or both nostrils after the injury – i.e. the affected nostril feels (or seems) totally stopped up.

How are Broken Noses Diagnosed?

Nose Fractures are Usually Diagnosed Based On:

  • The mechanism of injury (e.g. if there’s a direct blow to the nose).
  • The symptoms.
  • The physical exam.

Insider Info: Imaging of the nose (as in the form of x-rays) isn’t usually necessary.

How are Nose Injuries Managed?

If Your Child Sustains a Nose Injury, Here are the Initial Steps to Manage It:

1. Stop the Bleeding (If There’s a Nosebleed).

You can do this by pinching your child’s nostrils together with a tissue. Have your child lean forward (not backward) while holding pressure.

2. Move Your Child to a Calm, Quiet Location.

Why? Because when your kiddo cries, the blood will flow more freely, making the nosebleed harder to control.

3. Rule Out Other Injuries (Such as Eye Injuries).

4. Examine the Nose to See If It Looks Swollen and/or Deformed.

5. Apply Ice or a Cold Compress to the Nose to Reduce the Swelling.

6. Call the Doctor.

Insider Info: Although time is always of the essence when it comes to injuries, ENTs (ear, nose, and throat doctors) often wait to treat broken noses (for 3-5 days) until the swelling has gone down. You should still call the doctor, though.

If the nose is broken but the swelling isn’t too bad, the ENT may be able to repair the nose that day. If there’s a septal hematoma, then it needs to be drained immediately. The ENT will discuss the treatment plan with you if your child breaks their nose or if they develop a septal hematoma.

To fix the broken nose, ENTs can usually do something called a “closed reduction,” which means they use their hands to move the nasal bones back into place. This hurts, but don’t worry, doctors give kids pain medicine beforehand to reduce the discomfort. Pain control is a major goal in the management of broken noses in kids.

For severe nose fractures, surgery may be required.

Note: Most kids with isolated nose fractures will be instructed to avoid ALL sports activities for 2 weeks. Contact sports (such as football, roughhousing with siblings, and lacrosse) are usually off-limits for 6 weeks.

The Bottom Line: If you suspect that your child has a broken nose or they seem unable to breathe out of one nostril after a nose injury, let the doctor know ASAP.

Ear Injuries

Although ear injuries are less common than nose injuries, they can be more serious. Because of this, they need to be evaluated quickly. If your child suffers an injury to their outer ear (the part other than the earlobe) and the outer ear is cut, swollen, or bruised, call the doctor ASAP. In this case, they’ll probably send your child to the ER or to an ENT for an emergency appointment.

Jeez, Why the Rush? Because the outer ear is delicate and has its own (tenuous) blood supply. A bruise on the outer ear (due to a cut or to direct trauma to the ear) can interrupt the blood flow to the cartilage of the outer ear and result in an ear deformity called “cauliflower ear.” Cauliflower ear is frequently seen in wrestlers. While it’s often a badge of honor for them, it’s not a great look for the rest of us.

Bonus Material:

Here are Three Other Ear Problems to Look Out For:

1. Infected Ear Piercings 

An infected ear piercing presents with redness, swelling, and tenderness around the earring hole. The earlobe may be itchy as well. In more severe cases, there’s drainage from the earring hole and crusting around it. If your child has pierced ears and develops these symptoms, take the earring out and give the ear a rest. Apply hydrogen peroxide to the affected area, as well.

Caveat: If your child just got her ears pierced and you’re worried about the hole closing up, keep the earring in and be diligent about applying the hydrogen peroxide.

If the infection seems to be getting worse, call the doctor. Why? Because they may want to prescribe an antibiotic.

PediaTip: To prevent ear piercings from getting infected, have your child wear earrings with hypoallergenic posts made of either stainless steel or 14-karat gold. The extra cost is worth it.

Heads Up: In the case of newly pierced ears, the back of the earring can grow into the skin if it’s pinched too tightly against the earlobe. If this happens, the ENT will make a small incision in the earlobe to get the back of the earring out. Antibiotics may be prescribed as well.

2. A Foreign Body in the Ear

Kids (especially toddlers) are fans of sticking things in whatever body orifice they can find. This includes the ears. If you think something is stuck in your child’s ear or you notice blood or foul-smelling fluid draining from the ear, call the doctor ASAP.

If the foreign body isn’t shoved too deeply inside the ear canal, the pediatrician may be able to remove it in their office. If the pediatrician can’t reach it, an ENT will have to step in.

3. Head Injuries With Ear Bleeding or Bruising (This is Uncommon, But Worth Mentioning)

Bleeding from the ear canal or bruising behind the ear after a big head injury are signs of a skull fracture (namely of a basilar skull fracture). These symptoms signal the need for immediate attention (think: 911 immediate).

The Bottom Line

Nosebleeds are common in children as are nose injuries. Ear injuries are less common but can be problematic. If your child sustains a nose injury or an ear injury let their doctor know.

Celebrities Are Just Like Us!

“If I’m talking to the
2-and-a-half-year-old and I’m done,
I’ll just be like, ‘We’ve got to switch.
I don’t want to talk to this kid anymore.’”

~Kristen Bell

The Reminders for This Week are the Same as Last Week’s. Get Wise About Them Below…

  • Limit Your Child’s Whole Milk to 16-20 Ounces Per Day (Starting at 2 Years of Age).
  • Feed Your Child What You Eat, But Cut Into Bite-Sized Pieces.
  • Steer Clear of Choking Hazards. Get Wise About the Top 10 (Food) Choking Hazards Here.
  • Brush Your Child’s Teeth Twice a Day (Especially After the Last Meal of the Night) and Have Them Visit the Dentist Every 6 Months (Unless the Dentist Says Otherwise).
  • Call the Doctor If Your Child Spikes a Fever Above 102.2°F OR If They Develop Any Other Worrisome Symptoms (Such as Lethargy or Poor Feeding).
  • Continue to Give Your Child a Daily Vitamin D Supplement (600 International Units Per Day).
  • Keep Your Child in the Rear-Facing Position in Their Car Seat Until They Exceed the Height and Weight Restrictions Outlined by the Manufacturer.

And…That’s a Wrap!

Welcome to Month 31 (Week 2) of Parenting Your Toddler! 

In This Week’s PediaGuide Article, We’ll Discuss:

Get Wise About It All Below…

Last week’s PediaGuide article focused on eye issues, including eye trauma. This week, we’ll turn our attention to tooth and mouth trauma and discuss what happens when a baby tooth gets knocked out. We’ll also provide a sneak peek of what to do if your child’s “adult” tooth gets knocked out when they’re older. It’s the same thing you should do if you lose a tooth.

Tooth Trauma in Children

The Management of a Knocked-Out Tooth Depends on Whether the Tooth is a Baby Tooth or an Adult Tooth. 

Does It Really Matter If a Baby Tooth Gets Knocked Out? It’s Going to Fall Out On Its Own Anyway.

True. Knocked-out baby teeth aren’t usually a big deal and won’t be re-implanted if lost. Still, you should call the dentist to let them know what happened, especially if you can’t find the tooth.

Why?

For the Following Reasons:

1. If you can’t find the tooth, it may have accidentally been pushed back into your child’s gums OR your child may have accidentally inhaled it into their lungs.

Insider Info: Swallowing a tooth into the stomach isn’t a problem. Aspirating it into the lungs is a different story.

2. When a baby tooth is forcefully lost, there’s a small chance of damage to the nerve root and underlying permanent tooth. The dentist might want to take an X-ray to rule out these complications.

3. Depending on the location of the lost tooth, the dentist may put a spacer in your child’s mouth to make sure there’s room for the permanent adult tooth to come in.

4. The doctor can sometimes insert a temporary fake tooth in the mouth as a placeholder if you can’t bear the sight of your child’s newfound gap.

PediaTips:

  • Bring the knocked-out baby tooth (if found) to the dentist’s office so they can examine it.
  • Do not try to put the baby tooth back in its socket.

    Why? Because this could interfere with the eruption of the adult tooth coming in behind it.

What If the Baby Tooth is Knocked Loose, But Doesn’t Come Out?

A baby tooth that’s been knocked loose is even less of a big deal than a knocked-out baby tooth. That being said, the recommendation is still to call the dentist.

Why? Because the dentist might want to get an X-ray to make sure there isn’t any damage below the surface of the gum.

If the patient is a baby, the dentist may even pull the tooth out because it can be a choking hazard.

Reminder: Kids naturally start to lose their baby teeth around 6-7 years of age. Before then, a loose baby tooth is more likely to have been knocked loose than to be loose because the tooth is getting ready to fall out.

How Is a Chipped Baby Tooth Managed?

Not to sound like a broken record but let the dentist know if your child’s baby tooth gets chipped. Your little one may need an X-ray to rule out nerve damage and to make sure the tooth isn’t cracked at the base.

Insider Info: If your child’s grill is an eyesore and the chipped tooth isn’t going to fall out anytime soon, the dentist may be able to repair the tooth (i.e. bond it) to make it look prettier.

The Bottom Line: If your child’s baby tooth gets knocked out, knocked loose, or chipped, call the dentist. They’ll examine your child’s mouth and might order x-rays.

Sneak Peek: What to Do If Your Child’s ADULT Tooth Gets Knocked Out…

A Knocked-Out Adult Tooth, Unlike a Knocked-Out Baby Tooth, Is a Dental Emergency and Requires Immediate Care. If One of Your Child’s Permanent Teeth Gets Knocked Out at Some Point, Do the Following:

1. Hold the Tooth by the Crown (the Part We Chew With), Not by the Root (the End That’s in the Socket).

2. If the Tooth is Dirty, Gently Rinse It With Cold Water for 10 Seconds.

3. At This Point, You Can Choose 1 of 4 Options:

  • Option #1: Put the tooth back in its socket and have your child hold it in their mouth until you get to the dentist’s office. It takes a bit of coordination to do this. To make it easier, have your child bite down on a towel or a gauze pad to hold the tooth in place.
  • Option #2: If your child is unable to hold the tooth in their mouth, put the tooth in a glass of milk.
  • Option #3: A third option is to have your child spit into a cup, then put the tooth in their saliva (it’s okay if the saliva is bloody).
  • Option #4: Put the tooth in a “permanent tooth-preserving solution” (such as Save-a-Tooth).

Do not put the tooth in a cup of tap water. You can rinse the tooth with tap water, but don’t store it in tap water.

PediaTip: Once you’ve picked one of the four options above, make sure to keep the tooth moist at all times (either in the saliva, the milk, or in the permanent tooth-saving solution).

4. Rush to the Dentist’s Office (Call En Route) to Get the Tooth Re-Implanted. The goal is to be seen by the dentist within 15 minutes of the tooth getting knocked out.

Why? Because the sooner your child is seen by the dentist, the greater the chance of saving (i.e. successfully re-implanting) the tooth. Every minute counts. If it’s at night, call the on-call dentist.

A Word About Mouth Injuries

Kids who get hit in the mouth may have their tooth knocked out and/or sustain other mouth injuries. Mouth injuries tend to bleed a lot but often heal well on their own (i.e. without stitches).

That Being Said, Here are 4 Emergency Mouth Injuries to Have on Your Radar:

1. An injury that goes completely through the cheek (think: a pencil through the cheek).

2. A cut that goes through the entire tongue.

3. A puncture wound to the back of the throat (such as when a child falls face-first with a toothbrush in their mouth).

4. A mouth injury due to an animal bite.

These Situations Call for an Immediate Trip to the ER.

A Word About Cuts to the Lip Border

Though not a medical emergency per se, cuts to the border of the lip need immediate attention and often require a plastic surgeon to put in the stitches.

Why a Plastic Surgeon? Because it’s difficult to line up the skin of the lip border in a way that avoids scarring. If your child gets a cut that goes through the border of their lip, call the pediatrician to see if you should go directly to the ER or to a plastic surgeon’s office instead.

The Bottom Line

Tooth and mouth injuries are fairly common in children. Most of these injuries aren’t severe and tend to heal on their own. However, for the red-flag mouth injuries mentioned above, call the doctor and be prepared to take your child to the ER.

If your child gets hit in the mouth and their baby tooth gets knocked out, knocked loose, or chipped, ring the doctor. If your child’s adult tooth gets knocked out when they’re older, remember that it’s a medical emergency and they need to see the dentist ASAP.

And…Breathe…

“When your ‘mom voice’ is so loud
even the neighbors brush their
teeth and get dressed.”

~Team Scary Mommy

The Reminders for This Week are the Same as Last Week’s. Get Wise About Them Below…

  • Limit Your Child’s Whole Milk to 16-20 Ounces Per Day (Starting at 2 Years of Age).
  • Feed Your Child What You Eat, But Cut Into Bite-Sized Pieces.
  • Steer Clear of Choking Hazards. Get Wise About the Top 10 (Food) Choking Hazards Here.
  • Brush Your Child’s Teeth Twice a Day (Especially After the Last Meal of the Night) and Have Them Visit the Dentist Every 6 Months (Unless the Dentist Says Otherwise).
  • Call the Doctor If Your Child Spikes a Fever Above 102.2°F OR If They Develop Any Other Worrisome Symptoms (Such as Lethargy or Poor Feeding).
  • Continue to Give Your Child a Daily Vitamin D Supplement (600 International Units Per Day).
  • Keep Your Child in the Rear-Facing Position in Their Car Seat Until They Exceed the Height and Weight Restrictions Outlined by the Manufacturer.

And…That’s a Wrap!

Welcome to Month 31 (Week 1) of Parenting Your Toddler!

In This Week’s PediaGuide Article, We’ll Discuss:

Get Wise About It All Below…

Any parent who has shown up to work with pink eye knows that it’s contagious as #%! Pink eye isn’t the only cause of eye redness in children, though.

Get Wise below about pink eye, other causes of eye redness in toddlers, and red flags to watch out for.

Symptom Spotlight: Eye Redness in Toddlers

There are a Bunch of Things That Can Cause Eye Redness (With or Without Eye Goop) in Children. The Most Common Causes of Eye Redness in Toddlers Are:

1. Pink Eye: As mentioned above, pink eye is a relatively benign, but not-so-attractive, bacterial (or viral) infection that’s highly contagious and can spread to adults.

2. Allergies.

3. A Foreign Body in the Eye.

4. Eye Trauma.

Get Wise(r) About These Common Red-Eye Culprits Below…

Bacterial Pink Eye (Fancy Name: Bacterial Conjunctivitis)

Bacterial pink eye is caused by….wait for it….bacteria.

Clues That Your Child Has Bacterial Pink Eye Include:

  • The whites of both eyes are red (fancy name: conjunctival injection).
  • There’s yellow or green discharge coming from the eyes. The eyes are usually goopy upon awakening and the eyelashes may be matted together.
  • Your child may have other symptoms, too, such as a runny nose, a cough, or a fever.

Insider Info: Ear infections can accompany eye infections.1 Therefore, let the doctor know if your toddler becomes extra fussy or spikes a fever after developing eye redness.

How is Bacterial Pink Eye Treated? Bacterial pink eye is super contagious and should be treated with prescription antibiotic eye drops (such as Polytrim 4 times a day).

Common Question: When Can My Child Return to School or Daycare After Being Treated for Bacterial Pink Eye?

Most Daycares and Preschools Allow Children to Return Either:

1. 24 hours after starting the eye medication,

OR

2. When the eye goop has gone away. 

Check the policy at your child’s school or daycare.

In addition, Get Wise about how to put eye drops and eye ointment in a (protesting) child’s eyes.

Viral Pink Eye (Fancy Name: Viral Conjunctivitis)

Although Parents and Doctors are Always on the Lookout for Bacterial Pink Eye, Viruses are Actually the Most Common Cause of Pink Eye in Children. 

Clues That Your Child Has Viral Pink Eye, Include:

  • The whites of both eyes are red. This is also seen with bacterial conjunctivitis.
  • Watery (rather than goopy) eyes (unlike bacterial conjunctivitis).
  • Cold symptoms (such as a runny nose, a cough, and a fever) may be present too.

PediaTip: Since there’s a lot of overlap between the symptoms of bacterial conjunctivitis and those of viral conjunctivitis, it’s best to let the doctor know if your child develops eye redness.

How is Viral Pink Eye Treated?

Viral pink eye resolves on its own without treatment (i.e. without antibiotic drops). It’s highly contagious, though, so you’ll want to practice good handwashing at home.

Allergic Red Eye (Fancy Name: Allergic Conjunctivitis)

Environmental allergies (such as allergies to pollen and pet dander) can make the eyes look red, as well. Allergic conjunctivitis typically causes red, watery, and itchy eyes without goop. These symptoms will crop up during certain times of the year or around specific allergens (think: cats). Allergic conjunctivitis is uncommon in kids under 2 years.

Clues That Your Child Has Allergic Conjunctivitis (aka Allergic Pink Eye), Include:

  • The whites of the eyes are red.

    Note: Both eyes are (usually) affected.
  • The eyes are watery and other allergy symptoms are present, including nasal congestion, sneezing, and coughing (especially at night).
  • Your child is rubbing their eyes frequently.

Allergic conjunctivitis isn’t contagious, and the symptoms can be alleviated with eye drops that contain an antihistamine. More severe cases may require an oral antihistamine or a short course of eye drops with steroids in them.

Foreign Bodies in the Eye

Toddlers (like adults) can get such things as lint, eyelashes, dirt, and sand in their eyes. These foreign bodies can be super irritating and lead to eye redness.

Foreign bodies usually create symptoms only in one eye (unless your child is unlucky enough to get a foreign body in both eyes). In addition to being red, the eye will tear up and feel uncomfortable.

If You See a Foreign Body in Your Child’s Eye, Try to Flush it Out With Water. Here are the Steps to Do This:

1. Lean your child’s head back.

2. Hold the eye open by pulling down on the lower lid and up on the upper lid (this is often a two-person job).

3. Gently drip water over your child’s forehead into the eye.

Insider Info: Your toddler will not be a fan of this process and will probably squirm & scream bloody murder or cry. Crying, in this case, isn’t such a bad thing because the tears may help wash the foreign body out.

If you can’t get the foreign body out or if it seems to be causing more pain than you would expect, call the doctor.

Eye Trauma

Because toddlers are always underfoot and running around like madmen (and madwomen), eye injuries are not infrequent in this age group.

The 3 eye injuries we typically see in toddlers (from least to most severe) are: subconjunctival hemorrhages, corneal abrasions, and hyphemas.

Get Wise(r) About Them Below…

Subconjunctival Hemorrhages

A subconjunctival hemorrhage is a broken blood vessel in the white part of the eye. Subconjunctival hemorrhages are typically caused by mild trauma to the eye (such as a scratch from a fingernail). Some babies are even born with a subconjunctival hemorrhage (especially those who had a tough delivery).

Yikes. Are Subconjunctival Hemorrhages Serious?

Nope. Even though subconjunctival hemorrhages look kind of freaky, they’re not a big deal and usually heal on their own. Still, you may want to run it by the doctor if the redness persists beyond 1–2 weeks or if it occurred after an eye injury (just in case there’s something else going on).

Corneal Abrasions

A corneal abrasion is a scratch on the cornea (the outer layer of the eye). Corneal abrasions usually affect only one eye (at a time).

What Causes Corneal Abrasions?

Corneal Abrasions Can Be Caused By Such Things As:

  • A foreign body in the eye (think: dirt or lint).
  • Trauma to the eye (such as a scratch from a toy or a fingernail).
  • In Older Kids: Ill-fitting contact lenses or contact lenses that haven’t been cleaned properly.

What are the Symptoms of a Corneal Abrasion?

Corneal abrasions hurt like a mother and cause eye redness, excessive tearing and extreme sensitivity to light.

If your child has a painful, red, and watery eye that seems sensitive to light, call the doctor ASAP.

How are Corneal Abrasions Diagnosed?

Corneal Abrasions Can Usually Be Diagnosed in the Pediatrician’s Office.

  • The pediatrician will first examine the affected eye to rule out things such as a foreign body, a penetrating injury, and vision loss.
  • If a corneal abrasion is suspected, the doctor will confirm the diagnosis by putting a few drops of “fluorescein” (a dye) in the eye to stain it. Then they’ll look at the eye with a special light. If there’s a corneal abrasion, the dye will highlight it. Most doctor’s offices have this testing capability.

The Pediatrician Will Refer Your Child to an Eye Doctor If They:

  • Are unsure of the diagnosis.
  • Don’t have fluorescein at their office.
  • Are worried that something more serious is going on.

How are Corneal Abrasions Managed?

  • The good news is that corneal abrasions heal quickly (often within 1-3 days).
  • The not-so-good news is they need to be treated with an antibiotic ointment to prevent an infection. Kids, as you can imagine, aren’t fans of having medications put in their eyes.
  • Your child would (probably) be referred to an eye doctor if the corneal abrasion didn’t heal within 3-4 days OR if they were having trouble keeping the affected eye open.

Blast From the Past: Back in the day, doctors used to put a patch over the eye with the corneal abrasion. However, newer studies have shown that “patching” doesn’t help with the pain of a corneal abrasion and may actually delay the healing process.2 Plus, it’s nearly impossible to keep an eye patch on a young child.

Hyphemas

A hyphema is a collection of blood in the front chamber of the eye. Hyphemas are pretty rare and are typically caused by blunt trauma to the eye (such as when a baseball, paintball, or soccer ball hits the eye).

How are Hyphemas Diagnosed?

The mechanism of injury and the patient’s symptoms & physical exam will often point the doctor in the direction of a hyphema.

Common Symptoms of Hyphemas Are: 

  • Eye pain.
  • Sensitivity to light.
  • Trouble seeing. 

Upon inspection of the affected eye, the doctor may see a pool of blood at the bottom of the iris (the colored part of the eye). This is a classic sign of a hyphema.

Double Take: People tend to mix up subconjunctival hemorrhages and hyphemas when they hear the phrase “blood in the eye.” Remember, a subconjunctival hemorrhage is a ruptured blood vessel in the white part of the eye and a hyphema is the pooling of blood in the front chamber of the eye (at the bottom of the iris). Here’s a picture of each:

PediaTip: Always call the doctor if you suspect a hyphema or if you’re not sure what you’re looking at.

How are Hyphemas Managed?

Hyphemas are a medical emergency because they can lead to permanent vision loss. Therefore, a child with a suspected hyphema, needs to see an eye doctor ASAP (either in their office or in the ER).

What Will the Eye Doctor Do for the Hyphema?

The Eye Doctor Will First Do a Thorough Eye Exam (in Their Office or at the Hospital). They May Then Recommend:

  • Daily eye exams for 1 week (in either an outpatient or hospital setting) to make sure the hyphema is resolving and there aren’t any complications (such as increased pressure in the eye, which can lead to nerve damage and/or vision loss).
  • Eye drops or eye ointment for the pain and to minimize the risk of rebleeding.
  • An eye shield (to be worn for 7+ days).
  • Limited activity for a week or so.

Insider Info: Only 5% of patients with a hyphema require surgery to remove the blood from the eye and most of these patients have an underlying bleeding disorder (such as sickle cell disease).3

The Mysterious Case of the Swollen-Shut Eye

Now, let’s move on to a scenario that both outpatient pediatricians and ER docs know all too well. This is the case of a child who wakes up in the morning with one eye swollen shut. This is a totally freaky (not to mention puzzling) situation for the parents and requires a call to the doctor.

What Do Doctors Worry About in This Case?

They worry about preseptal cellulitis and orbital cellulitis, especially the latter. 

What are Preseptal Cellulitis and Orbital Cellulitis?

  • Preseptal cellulitis (also known as periorbital cellulitis) is an infection of the skin & tissues in the front part of the eye.
  • Orbital cellulitis is a more severe infection that has spread deeper into the eye (namely into the tissues within the eye socket).
  • Orbital cellulitis is an emergency.
  • Although preseptal cellulitis isn’t an emergency per se, it still needs to be identified and treated quickly.

    Why? Because it can turn into orbital cellulitis if it isn’t caught early enough.

What are the Symptoms of Preseptal and Orbital Cellulitis?

For Both Preseptal and Orbital Cellulitis:

  • The Child’s Eye May Be Completely Swollen Shut. For less-severe cases of preseptal cellulitis, the upper eyelid may just look red, swollen, and droopy.
  • The Skin Under the Eye May Be Swollen Too (As in the Pic Below). The child will often look like they got punched in the face and developed a shiner even though their parents never witnessed any trauma to the eye.

Image Source: RCNi

To Distinguish Between Orbital Cellulitis and Preseptal Cellulitis, the Doctor Will Focus on the Following:

  • Is there pain with eye movement?
  • Is the child’s vision blurry (when the eyelid is lifted up by the doctor)?
  • Is the child struggling to move the eyeball (i.e. to look around)?
  • Is the affected eyeball sticking out more than the other one (fancy name: proptosis)?

If the Answer is YES to Any of the Above, the Child May Have Orbital Cellulitis.

Insider Info:

  • Preseptal cellulitis can sometimes be mistaken for a stye (a red bump that causes eyelid swelling). It’s best, therefore, to have all eyelid swelling checked out by a doctor.
  • Eyes that are swollen shut tend to look worse in the morning. Once the child is up and moving around, the eye will look less swollen. It’s important to have the doctor examine the eye, though, even if it looks better.

What Causes Preseptal and Orbital Cellulitis?

They’re both caused by bacteria that slip through a small break in the skin around the eye. Minor bug bites, small cuts, and pimples are all avenues for the entry of bacteria. For example, you may notice that your child has a minor bug bite one day and the next day their eye is swollen shut. Preseptal cellulitis and orbital cellulitis are weird like that!

Questions Doctors Usually Ask to Determine Whether a Child Has Preseptal or Orbital Cellulitis:

  • When did the swelling start?
  • Did you notice any bug bites or cuts around the eye?
  • Was there any trauma to the eye?
  • Does your child have a fever?
  • Are they complaining of eye pain, light sensitivity, or vision loss?

What’s the Treatment for Preseptal and Orbital Cellulitis?

  • Preseptal and orbital cellulitis are treated a bit differently, so it’s important for the doctor to determine which one a patient has. The doctor can usually differentiate between the two based on the clinical presentation. If not, they’ll likely order a CT scan of the child’s eyes and sinuses to help make the diagnosis.
  • Both preseptal and orbital cellulitis require antibiotics, but patients with orbital cellulitis need to be treated with IV antibiotics in the hospital.
  • Preseptal cellulitis, on the other hand, can usually be treated with an oral antibiotic at home, with close follow-up with the doctor.

What the Doctor Will Want to Know About Your Child’s Eye Redness And/Or Eyelid Swelling

Almost all eye redness (and/or eyelid swelling) needs to be checked out by a doctor. Why? Because there’s a wide range of things that can cause these symptoms in children and doctors don’t want to miss anything serious.

Questions the Doctor Will Have About Your Child’s Eye Redness and/or Eyelid Swelling:

  • When did the eye symptoms start?
  • Is only one eye affected or both?
  • Is there any eye goop?
  • Are the eyes watering?
  • Are there any other associated symptoms (such as a runny nose, a cough or a fever)?
  • Is your child in pain?
  • Does your child seem sensitive to light?
  • Is the eyelid swollen? Is the eye swollen shut?
  • Have you noticed any bug bites or rashes around the eye or on the eyelid?
  • Was there any recent trauma to the eye?
  • Do you see a foreign body (such as an eyelash or dirt) in the eye?

    Reality Check: Foreign bodies can be hard to see.

PediaTip:

Don’t be mad at the on-call doctor if they refuse to prescribe antibiotic eye drops over the phone. If the doctor knows your child and you’re stuck on a deserted island & everyone on it has a confirmed case of pink eye, they might call in a prescription for antibiotic eye drops. If not, they’ll (probably) want to examine your child in case something more serious is going on.

The Bottom Line

Eye redness is a fairly common symptom in children and should always be discussed with a doctor. Swollen eyelids, which are a less common finding, warrant a call to the doctor as well.

“Great parenting lies somewhere between
‘don’t do that!’ and ‘ah, what the hell!’”

~ILiketoQuote.com

The Reminders for This Week are the Same as Last Week’s. Get Wise About Them Below…

  • Limit Your Child’s Whole Milk to 16-20 Ounces Per Day (Starting at 2 Years of Age).
  • Feed Your Child What You Eat, But Cut Into Bite-Sized Pieces.
  • Steer Clear of Choking Hazards. Get Wise About the Top 10 (Food) Choking Hazards Here.
  • Brush Your Child’s Teeth Twice a Day (Especially After the Last Meal of the Night) and Have Them Visit the Dentist Every 6 Months (Unless the Dentist Says Otherwise).
  • Call the Doctor If Your Child Spikes a Fever Above 102.2°F OR If They Develop Any Other Worrisome Symptoms (Such as Lethargy or Poor Feeding).
  • Continue to Give Your Child a Daily Vitamin D Supplement (600 International Units Per Day).
  • Keep Your Child in the Rear-Facing Position in Their Car Seat Until They Exceed the Height and Weight Restrictions Outlined by the Manufacturer.

And…That’s a Wrap!

Welcome to Month 30 (Week 4) of Parenting Your Toddler!

In This Week’s PediaGuide Article, We’ll Discuss:

Get Wise About It All Below…

Have you ever found yourself negotiating with your toddler and wondered why a pint-sized human who can’t even speak in full sentences is giving you a run for your money? Welcome to parenthood!

While all toddlers have moments of opposition, some are more strong-willed than others. This is a result of natural differences in temperament, which we see play out in adults, as well. In the 1970s, two physician-researchers, Alexander Thomas and Stella Chess, suggested that kids have 3 distinct temperament styles. They are:

1. “Easy”: 40% of the population.

2. “Difficult”: 10% of the population.

3. “Slow to Warm” (these kids take longer to feel comfortable in new situations): 15% of the population.

The Remaining 35% of Kids Fall Into the “Other” Category and Can Be Found Somewhere Along the “Easy” to “Difficult” Continuum.

Regardless of What Type of Child You Have, Know That:

  • These Categories Represent a Range of Normal. There’s nothing “wrong” with “difficult” or “slow-to-warm” children, even though they’re often harder to parent than “easy” kids.
  • Kids Come Into the World With Different Wiring. Because of this, it’s important to find the right parenting strategy for your child’s temperament. For example, parents may need to teach easygoing kids to take more risks and stand up for themselves. Difficult children, on the other hand, require firm boundaries and tons of positive reinforcement so they don’t end up feeling like “bad kids.” Meanwhile, “slow-to-warm” children benefit from the message that it’s okay to hang back and scope out the scene before diving in.
  • Although Kids Are Wired Differently, Their Temperament Styles are Not Completely Set in Stone. “Easy” kids can turn into rebellious teens, while “difficult” and “slow-to-warm” children may become less challenging over time with the right tools.
  • Kids Live Up to Their Labels. Use your child’s temperament type to guide your parenting but try not to label them. Why? Because kids take these labels to heart and may let them define them.

Get Wise below about how to parent your child based on their temperament. In addition, learn how to manage oppositional behavior in toddlers, in general.

Parenting Tips for the Different Temperament Types

The “Easy” Child

Having an “easy” child often translates into having fewer bumps along the parenting road. Easy children usually go with the flow and tend to be more flexible and less combative than their more “difficult” peers. Although it may seem like easy children could parent themselves, we all know that “easy” doesn’t mean “perfect” or totally conflict-free.

Here are Some Tips for Parenting “Easy” Children:

  • Get Out of Their Way. While you can’t go on autopilot with an easy child, you don’t want to “over-parent” them and override their agreeable nature, either. Think of yourself as more of a coach than a parent and gently nudge your child back on track when they go off course.
  • Compliment Your Child on Their Easygoing Qualities (But Not Too Much). In the beginning, easy kids don’t even know they’re easy. To keep your child’s good-natured vibes going, offer specific compliments that highlight their positive qualities.

    For example, you can say, “I like how flexible you were about sharing your toy,” or “Thanks for getting ready when I asked.” Avoid labeling your child as “easy,” though.

    Why? Because it will put pressure on them to be “easy” and happy all of the time (which is too high a standard for anyone).
  • Make Sure That “Easy” Doesn’t Become “Conflict Avoidant.” There’s a fine line between being “easy” and being a total pushover. While being easygoing is great, make sure that it’s not morphing into a fear of conflict.
  • Give Your Child Room for Self-Expression and Tantrums. Being easy doesn’t mean “having it together” every second. All kids need to blow off steam at times. So don’t be appalled if your “easy” child has meltdowns and tantrums. Applaud self-expression over repression.
  • Celebrate Risk-Taking. Easygoing kids are less likely to push themselves to take risks. Encourage your child to challenge themselves by taking (calculated) risks and building independence.

The “Difficult” Child 

“Difficult” children test their parents’ patience more than “easy” children. They tend to be more reactive, more oppositional, and less adaptable than “easy” kids. As babies, difficult children are often fussy and sensitive to external stimuli.

Double Take: Babies with colic and reflux often seem like they’re going to be “difficult” children, but many of them end up having easygoing temperaments when their symptoms clear up.

Here are Some Tips for Managing Difficult and Defiant Kids:

  • Set FIRM Boundaries and Be Consistent. This is probably the most important tip for managing difficult children. Parents of “difficult” children often try out a bunch of parenting techniques (such as bribery, authoritative parenting, laissez-faire parenting, and yelling a lot) in search of the “magic bullet.” The problem is the magic bullet doesn’t exist. However, setting clear rules and following them will create an overall shift in the energy. It won’t be immediate, but over time the pressure valve will start to release.
  • Try to Understand Where Your Child is Coming From. Many parents think defiance is a choice and feel like they’re being manipulated by their child. This is actually not the case. Defiance is (initially) born out of frustration and occurs because kids don’t have the proper tools for self-expression.

    As parents throw more energy at the defiant behavior, it becomes a habit. Difficult kids begin to think they’re “bad” and that the only way they can get attention (read: love) is by being oppositional. Remember, kids covet any and all attention (even if it’s negative). Break this negative cycle by taking a breath and seeing the negative behavior as a sign that your child is overwhelmed and needs support rather than punishment.
  • Boost Your Positive-to-Negative-Comment Ratio. Let’s face it, difficult children can be annoying, and it can be tempting to comment on every little irritating thing they do. Try to bite your tongue, though, and give more energy to the “good” than the “bad.” Over time, your child will realize they’ll get more bang for their buck with “good” behavior.

    PediaTip: Try a reward chart. Reward charts work well with defiant kids because they allow them to visually track their progress.
  • Send Loving Vibes (Rather Than Angry Vibes) to Your Child (Even If You Don’t Feel Very Loving in the Moment). When it comes to “difficult” children, throwing anger at their defiant behavior just adds fuel to the fire. While it’s normal to get “triggered” by your child’s oppositional behavior, you don’t have to act on your first impulse. Getting mad and yelling will just make your child shut down and think you’re “mean.” If you stay calm, however, and offer space and understanding (even love), your child may settle down and (eventually) reflect on their behavior (rather than write you off as a lunatic who doesn’t understand them).

    Insider Info: This doesn’t mean that you should give in to whatever request your child has. Acknowledge your child’s feelings and help them find healthier ways to express them.
  • Avoid Lectures. Kids at this age know when they’ve done something wrong, even if they pretend like they don’t. Instead of lecturing your child about their poor behavior, pause and either say nothing (silence may be more potent than words, in this case) or say a simple phrase like “No hitting” or “We need to go.” After about 5 words, your child will tune you out anyway.
  • Don’t Forget About Self-Care. It’s just plain harder to parent a “difficult” child than it is to parent an “easy” child. If you and your partner don’t take the time to care for yourselves, you may end up resenting (or even hating) your child at times. Do something kind for yourself every day so you can refuel and be ready for the next “battle.”
  • Watch Out for Labels and Comparisons. As mentioned earlier, “difficult” children tend to get labeled as “bad” or “troublesome.” Use words such as “spirited” or “high energy” when describing your child rather than falling into the negative-label trap. Or don’t say anything at all. If you have more than one child, avoid telling people that your defiant child is the “difficult” one and their sibling is the “easy” one.

    Book Club: Stellar books for parenting defiant children include:

The “Slow-to-Warm” Child

Slow-to-warm children like to observe the action before jumping into it. Some slow-to-warm kids are shy or introverted by nature, while others just need a minute or two to get going. Even though it’s normal for kids (and adults) to want to test the waters before entering a new situation, it makes many parents feel like something is wrong with their child.

Here are Some Tips for Managing “Slow-To-Warm” Kids:

  • Know What You’re Walking Into. Slow-to-warm children prefer small groups of people and lower-stimulation environments. Big, hyper crowds of children (think: birthday parties) are tough for them. Know the situation beforehand so you can anticipate how challenging it will be and warn your child. For example, you can say, “there will be a lot of kids at the birthday party and it might be a little noisy at first, but you’ll get used to it.”
  • Don’t Force It. If your child is hanging back or is hiding behind you, it means they’re overstimulated. Don’t throw your little one to the wolves and push them into the center of the crowd. Honor what they’re feeling by crouching down and waiting to see what they do. Some kids just need a second to calm down and find a point of entry (such as an activity that they like) before joining the fray.
  • Be Early. Showing up late to a birthday party that’s in full swing is a lot more overwhelming than being one of the first guests to arrive. Try to be early (if possible) to make the transition easier for your child.
  • Practice Makes Perfect. The more your child is exposed to new situations, the more comfortable they’ll be with them.
  • Try the “Rainbow” Greeting. Slow-to-warm kids tend to put their heads down, their hair in front of their faces, and scowl. They often look super unhappy or uncomfortable, signaling to the group that they either don’t want to be there (which may be true) or they don’t like anyone there (which probably isn’t true).

    Teach your child to radiate positive energy even when they’re hanging back. For example, teach them to smile, wave, and hold their head up while observing the crowd. I like to call this the “rainbow” greeting because it’s a more colorful, happier way to enter a room. Plus, most kids like the idea of rainbows (especially when there’s a pot of gold at the end of them). Practice this at home so that it becomes second nature.
  • Pick Your Child’s Preschool Wisely. Slow-to-warm children do best in small preschools with low student-to-teacher ratios. This prevents them from getting lost in the shuffle and from being overstimulated by their environment on a daily basis. 

A Word About “Oppositional Defiant Disorder” and “Conduct Disorder”:

Defiance Can Sometimes Spill Over Into Psychological Disorders Such as Oppositional Defiant Disorder and Conduct Disorder. 

Oppositional Defiant Disorder (ODD) is characterized by the following emotions and actions:

  • A frequently angry and irritable mood.
  • Defiant behavior, including constantly arguing with authority figures.
  • A vindictive attitude. Kids with ODD deliberately try to hurt others, yet blame everyone and their mother for their problems (i.e. they don’t take responsibility for their actions).

To meet the criteria for ODD, these symptoms must be present for at least 6 months and disrupt a child’s life (and the lives of others).

Mild oppositional defiant disorder occurs in only one setting (such as at home), whereas severe ODD occurs in three or more settings.

The earlier kids with ODD get help, the better.

Conduct Disorder is a step up from oppositional defiant disorder. Kids with conduct disorder intentionally break the rules, destroy property, light fires, steal, and harm people and animals.

Insider Info: A good pediatric psychotherapist can be instrumental in helping kids with ODD and conduct disorder.

5 Tips for Getting Past “No”

No matter what type of temperament they have, toddlers love to wield their power and say (or scream) “NO!” While we want our kids to find their voice, the constant “nay-saying” can be draining.

5 Tips for Managing the Toddler “No!” Include:

1. Set Firm Boundaries and Stick to Them: If your child is aware of the rules up front and knows that you’re unlikely to budge no matter how much they whine, yell, or pout, then you already have the upper hand.

2. Make Certain Things Non-Negotiable (Such as Buckling Up in the Car Seat or Holding Your Hand While Crossing the Street). This signals to your child that not everything is negotiable. Some rules have to be followed no matter what.

3. Problem-Solve With Your Child: If you deny your child’s initial request, give them the chance to come up with an alternative. For example, if you tell your child they can’t have an ice cream cone before dinner, see if they pivot and ask to have it after dinner or over the weekend. Write down your child’s suggestions to make them seem extra valuable.

4. Wait It Out: Give the problem space and wait to see what happens. This can help shift the negative energy.

5. Figure Out the Reason for the Outburst: Try to figure out why your toddler is being so obstinate. Are they refusing to leave the house because of fatigue, hunger, or fear of the destination (think: the doctor’s office). Even though a behavior may seem irrational, a rational explanation is often behind it.

The Bottom Line

Not every parenting technique works for every child. Take the time to understand your child’s temperament, so that you can tailor your parenting approach to their specific personality and needs.

“One day I will be thankful that
my child is strong-willed,
but that will not be today.”

~From the Boho Wedding Blog

The Reminders for This Week are the Same as Last Week’s. Get Wise About Them Below…

  • Limit Your Child’s Whole Milk to 16-20 Ounces Per Day (Starting at 2 Years of Age).
  • Feed Your Child What You Eat, But Cut Into Bite-Sized Pieces.
  • Steer Clear of Choking Hazards. Get Wise About the Top 10 (Food) Choking Hazards Here.
  • Brush Your Child’s Teeth Twice a Day (Especially After the Last Meal of the Night) and Have Them Visit the Dentist Every 6 Months (Unless the Dentist Says Otherwise).
  • Call the Doctor If Your Child Spikes a Fever Above 102.2°F OR If They Develop Any Other Worrisome Symptoms (Such as Lethargy or Poor Feeding).
  • Continue to Give Your Child a Daily Vitamin D Supplement (600 International Units Per Day).
  • Keep Your Child in the Rear-Facing Position in Their Car Seat Until They Exceed the Height and Weight Restrictions Outlined by the Manufacturer.

And…That’s a Wrap!

Welcome to Month 30 (Week 3) of Parenting Your Toddler!

In This Week’s PediaGuide Article, We’ll Discuss:

Get Wise About It All Below…

As toddlers get older, they yearn for independence but still want their parents nearby. These two opposing desires create some of the “Terrible Twos” angst that we see at this age. As your child starts to do more things for themselves and becomes less clingy, you may find your own internal conflict starting to brew. Although you want your little one to form their own identity and explore the world, you may be missing those baby days when the two of you were joined at the hip (or at the boob).

Get Wise below about the Top 10 Tips for Promoting Independence in Toddlers.

The Top 10 Tips for Fostering Your Child’s Independence (While Maintaining a Strong Bond):

1. Continue to Strengthen Your Connection.

The stronger your attachment with your child, the more confident they’ll be about separating from you.

Work “connect time” (i.e. uninterrupted bonding time) into the daily schedule. For example, put your phone on silent and play with your kiddo or read to them. Connect time does not have to last for hours on end; 10-15 minutes of quality time is better than an hour of going through the motions.

2. Offer Choices (But Not Too Many).

Give your child choices when appropriate. This will give them a sense of control and a feeling of empowerment.

3. Create a “Chore” List (But Keep It Simple).

At this age, your child is old enough to do a few simple “chores” or “jobs” around the house. Keep the chore list short and the jobs doable (think: putting toys away and sweeping the floor with a toy broom). Make a list of chores and encourage your child to check them off with a crayon as they complete them.

Why? Because who doesn’t love a finished to-do list?!

4. Ask Your Child If They Want to Help YOU With Your Daily Tasks (Then Make Their Role Manageable).

If you’re cleaning, cooking, or putting clothes in the dryer, ask your child if they want to help. This signals to your child that their contribution is valuable. If the answer is yes, make your child’s role manageable. For example, if you’re making a salad, ask your child to dry the lettuce and throw it in the salad bowl.

5. Watch the Hovering.

As we all know, toddlers can’t be trusted. Because of this, it’s common for parents to creep up on their children and watch over everything they do. Children sense this hovering, however, and not only find it annoying but interpret it as a lack of confidence in their abilities. Although it’s important to watch toddlers, avoid shadowing your child too closely (or at least try to do it on the DL).

6. Give Your Child the “Silent Treatment” — But in a Good Way.

The next time you and your child go to the park, take a moment to notice how often parents chirp at their kids — there is usually a steady stream of “Don’t touch that,” “Wash your hands,” and “Don’t step on the grass.” You should always say something when it comes to safety, but practice biting your tongue for the rest. Just observe and see what happens.

7. Put a Pin in the Criticism.

Your child is not going to do things exactly the way you want them to do them. Resist the urge to “fix” everything your child does. Applaud the effort rather than the outcome.

8. Be Independent Yourself.

Try to model what you’re teaching.

9. Skip the Bribery.

Why? Because you want your child to be internally (vs. externally) motivated to do things.

But What About Reward Charts? Reward charts create a different vibe. Kids feel a sense of accomplishment for completing their tasks and “earning” (rather than begging for) their rewards. Still, not everything should get a reward. Be intentional about how you give rewards and use them sparingly.

10. Figure Out How Long It Will Take You to Get Out the Door and DOUBLE It.

It usually takes twice as long as you’d think for toddlers to complete a task. Watching your child try to be independent can be frustrating if you’re short on time. Start everything earlier to give your child the space (and time) to figure things out on their own.

The Bottom Line

As your child grows and matures, they’ll slowly venture out of the nest. Practice the tips above to help your little one become more independent (while still feeling safe and supported).

“If you want children to keep
their feet on the ground,
put some responsibility
on their shoulders.”

~Abigail Van Buren

The Reminders for This Week are the Same as Last Week’s. Get Wise About Them Below…

  • Limit Your Child’s Whole Milk to 16-20 Ounces Per Day (Starting at 2 Years of Age).
  • Feed Your Child What You Eat, But Cut Into Bite-Sized Pieces.
  • Steer Clear of Choking Hazards. Get Wise About the Top 10 (Food) Choking Hazards Here.
  • Brush Your Child’s Teeth Twice a Day (Especially After the Last Meal of the Night) and Have Them Visit the Dentist Every 6 Months (Unless the Dentist Says Otherwise).
  • Call the Doctor If Your Child Spikes a Fever Above 102.2°F OR If They Develop Any Other Worrisome Symptoms (Such as Lethargy or Poor Feeding).
  • Continue to Give Your Child a Daily Vitamin D Supplement (600 International Units Per Day).
  • Keep Your Child in the Rear-Facing Position in Their Car Seat Until They Exceed the Height and Weight Restrictions Outlined by the Manufacturer.

And…That’s a Wrap!

Welcome to Month 30 (Week 2) of Parenting Your Toddler!

In This Week’s PediaGuide Article, We’ll Discuss:

Get Wise About It All Below…

Most kids love splashing around in pools and “swimming.” Even toddlers who hate bath time tend to get a kick out of being in a pool. Kids also like to hit the beach, stick their feet in the sand, and dig for buried treasure. At the same time that kids are enjoying the sunshine and water, their parents are often stressing about sunscreen, pool gear, and how to keep their child safe.

Get Wise about water safety and sun protection tips below. We’ll also talk about skin cancer in kids (which is super rare).

Water Safety Tips

Drowning is sadly the leading cause of injury-related deaths in children 1-4 years of age.1 The majority of drownings occur in family or neighborhood swimming pools. Drowning can happen in the blink of an eye even with adults watching and a lifeguard on duty.

This Isn’t Meant to Scare You, But to Highlight the Importance of Being Careful Around Water.

Here are the Top 6 Tips for Keeping Your Child Safe In (and Around) Pools:

1. Adult Supervision is Key.

Tap an adult to be on “pool duty.” It’s best for the adult to be in the pool, especially if they’re watching children who aren’t strong, independent swimmers. This enables the adult to provide “touch supervision.”

PediaTip: If you’re having a party with kids swimming and you expect the conversation (and alcohol) to be flowing, hire lifeguards. It’s safer and more fun for everyone.

2. Do the Following If You Have a Pool at Home:

  • Install a 4-sided fence with a self-closing gate around the pool. The fence should be at least 4 feet high.
  • Keep the pool cover closed, the pool fence secured, and the doors leading to the pool area locked (including pet doors) when you’re not in the pool.

    Why? Because drownings don’t always happen when people are out by the pool, swimming. Kids love water and may try to sneak out the door and go for a dip when everyone else is inside.
  • Consider installing an alarm that sounds when the gate to the pool or to the doors leading out to the pool are opened.
  • Make sure that your pool has an “anti-entrapment drain cover” (ask your pool maintenance person if you have one, if you’re not sure).

3. Teach Your Child to Swim. The American Academy of Pediatrics (the AAP) Recommends That Kids Start Taking Swim Lessons Around 1 Year of Age.2

Don’t, however, expect your child to swim well at first or to be responsible enough to do it on their own.

Handy Stat: Studies show that formal swim lessons reduce the likelihood of drowning by as much as 88% in kids 1-4 years of age.3

PediaTip: Avoid the “total immersion” swim classes that are popular for kids under 1 year. During these classes, infants are dunked under water and use their “survival instincts” to resurface. These classes haven’t been proven to reduce the drowning risk in kids, though, and can stress babies out.

4. Get CPR Trained, Just in Case.

5. Have Your Child Wear a Flotation Device in the Pool.

PediaWise Pick: The Body Glove Paddle Pals Life Jacket (for kids 30-50 pounds).

In addition, make sure to throw a life jacket on your child whenever they’re on a boat or near open water (e.g. when playing near the shore).

A Word of Caution: Don’t rely on these flotation devices too much, though — close supervision is still needed.

Sneak Peek: When your child gets older, teach them about riptides.

What’s the Story With Riptides, Again? If you’re ever caught in a riptide, swim parallel to the shore. Once you’ve escaped the current, you can swim towards the shore. This completely goes against one’s natural instincts, so it’s important to know this (and to practice it) when swimming in open water.

6. Immediately Drain Inflatable Wading Pools and Empty Buckets of Water.

Why? Because standing water is a drowning hazard even if it’s not all that deep. In fact, babies and young children can drown in less than 2 inches of water (think: in bathtubs, buckets, and toilets).4

The Bottom Line:

Enjoy the pool, the beach and the sun with your child but remember to be mindful of the water safety rules above.

Now, We’ll Switch Gears and Talk About How to Protect Your Child From the Sun. 

Tips for Staying Safe in the Sun

Infants and children have sensitive skin and can get sunburned fairly easily. Doctors worry about this because multiple sunburns in childhood are a risk factor for skin cancer. Plus, sunburns hurt! Here are some tips to help you protect your child’s skin from the sun:

  • Use a Sunscreen With an SPF of 30 or Higher: SPF stands for “sun protection factor.” Studies suggest that once you hit an SPF of 30, the higher SPFs have only marginally better sun protection and can give the user a false sense of security. For example, it’s been shown that an SPF of 30 blocks 97% of UVB rays, whereas an SPF of 50 blocks 98% of UVB rays. That’s only a 1 percent difference! More research is needed on this topic, though.

    Insider Info: Back in the day, the AAP said babies under 6 months should not use sunscreen (because of the potential for skin irritation). The AAP has changed its tune, however, and now gives sunscreen the thumbs-up for all ages.5
  • Be Mindful of the Hour. Peak sun hours are between 10 a.m.-2 p.m. Consider planning outdoor activities for “off-peak” hours.
  • Put Your Kiddo in Sun Protective (SPF-Infused) Clothing.
  • Apply Sunscreen Every 2 Hours AND After Water Play and Sweating.
  • Accessorize. Have your child rock a pair of sunglasses (with at least 99% UV protection) and wear a hat with a wide brim.
  • Know That Sun Reflection is a Thing. If you’re hitting the slopes with your child, don’t forget the sunscreen (since sunlight reflects off snow). Also, remember to apply sunscreen even when it’s cloudy or when your child is in the shade.

The Top 5 Tips for How to Choose a Sunscreen:

1. Pick a “Broad-Spectrum” Sunscreen That Protects Against Both UVA and UVB Rays (Most Do).

2. Select a Sunscreen With an SPF of 30 or Higher.

3. Invest in a Paraben-Free, PABA-Free Sunscreen.

4. Opt for a “Mineral” Sunscreen. The two main ingredients in mineral sunscreens are zinc oxide and titanium oxide. Even though mineral sunscreens tend to be thicker than non-mineral sunscreens, they have fewer chemicals. In addition, they sit on top of the skin and physically block the sun’s rays, whereas chemical sunscreens work by soaking into the skin and absorbing the sun’s rays.

5. Be Mindful of Which Form of Sunscreen You Use: For example, be careful when applying sunscreen in spray or stick form.

Why? Because it’s easier to miss spots with these types of sunscreen. That’s why dermatologists often prefer sunscreen lotions (even though parents and kids tend to find the sticks and sprays easier to use).

PediaTips:

  • Some kids think getting sunscreen put on them is form of torture. Introduce your child to sunscreen early on, so they get used it.
  • Remember, people of ALL skin types need sunscreen. People with darker skin tones naturally have a lower risk of skin cancer, but it’s not zero, so sunscreen is still needed.

PediaWise Picks for Sunscreens:

A Word About Skin Cancer

Skin cancer is rare in children. Still, it doesn’t hurt to let the pediatrician know if you’re concerned about a particular mole or freckle on your child. The doctor may say it’s nothing to worry about or they may want a dermatologist to follow it.

Alphabet Soup: Dermatologists Look at the “ABCDEs” When Examining a Freckle or a Mole and Want to Know the Following…

  • Asymmetry: Is the mole round (this is normal) or is it adopting a funky, asymmetrical shape (this is not normal)?
  • Borders: Are the borders regular or irregular (irregular is worse)?
  • Color: Is the mole uniform in color? Is it dark or light? Darker moles and moles with multiple colors are more concerning.
  • Diameter: Is the mole tiny or big? Moles the size of a pencil eraser or bigger tend to get the doctor’s attention.
  • Evolving. Is the mole growing in size, becoming more elevated, or changing in appearance?

    Note: Bleeding, crusting, and itching at the site of the mole are red flag signs.

Bonus Info: The doctor will also want to know if there’s a family history of skin cancer or other skin disorders.

The Bottom Line: If your child’s mole is asymmetrical, has funky borders, is dark, isn’t uniform in color, and is big and growing, then definitely reach out to the doctor.

A Word About Spitz Nevus Moles

What’s a Spitz Nevus Mole?

It’s a benign (non-cancerous) mole that’s fairly common in children.

Why Bring It Up If It’s Benign?

Because it can mimic skin cancer. Spitz nevus moles tend to look a little weird and grow quickly, freaking parents out.

What Can Be Done About a Spitz Nevus Mole?

The pediatrician may want to keep an eye on it or take it off before it gets too big (so the parents don’t have to worry about it). 

PediaTip: If your child has a freckle or a mole, let the doctor know (even if you think it might be a non-worrisome Spitz nevus mole). If the doctor decides to “watch” the freckle or mole, consider taking a picture of it every 6 months (or so) to follow its evolution over time. If the doctor is worried about it (at any point), they’ll refer your child to a dermatologist.

The Bottom Line

Enjoy the pool, the beach and the sun with your child but remember to be mindful of the water safety rules above and to apply sunscreen to your kiddo’s skin (even if they hate it).  

“What’s it like having a toddler?
Imagine raising a heavily caffeinated
chimpanzee who’s allergic to sleep.”

~My Merry Messy Life

The Reminders for This Week are the Same as Last Week’s. Get Wise About Them Below…

  • Limit Your Child’s Whole Milk to 16-20 Ounces Per Day (Starting at 2 Years of Age).
  • Feed Your Child What You Eat, But Cut Into Bite-Sized Pieces.
  • Steer Clear of Choking Hazards. Get Wise About the Top 10 (Food) Choking Hazards Here.
  • Brush Your Child’s Teeth Twice a Day (Especially After the Last Meal of the Night) and Have Them Visit the Dentist Every 6 Months (Unless the Dentist Says Otherwise).
  • Call the Doctor If Your Child Spikes a Fever Above 102.2°F OR If They Develop Any Other Worrisome Symptoms (Such as Lethargy or Poor Feeding).
  • Continue to Give Your Child a Daily Vitamin D Supplement (600 International Units Per Day).
  • Keep Your Child in the Rear-Facing Position in Their Car Seat Until They Exceed the Height and Weight Restrictions Outlined by the Manufacturer.

And…That’s a Wrap!

Welcome to Month 29 (Week 4) of Parenting Your Toddler!

In This Week’s PediaGuide Article, We’ll Discuss:

Get Wise About It All Below…

Last week, we talked about where the average 2.5-year-old falls on the growth chart. This week, we’ll turn our attention to the developmental milestones that are achieved by most 2.5-year-olds.

The 2.5-year (30-month) checkup will focus primarily on development, growth, sleep, diet, dental health, potty training and preschool readiness. This visit is typically shot (and bloodwork)-free. Wahoo!

The next round of vaccines (not including the yearly flu and COVID-19 shots) will be at the 4-year checkup.

Get Wise below about the 2.5-year developmental milestones and what you can expect. Remember, there’s a range of normal and every child is different. It doesn’t have to be perfect.

The 2.5-Year Developmental Milestones

Here’s a Breakdown of What 2.5-Year-Olds Can (On Average) Do:

Gross Motor Skills

As a Reminder, Gross Motor Skills are Skills That Require Large Muscle Groups to Work Together. When it Comes to Gross Motor Skills, 2.5-Year-Olds are Usually Able To:

  • Run without falling (most of the time).
  • Ride a tricycle.
  • Climb stairs with alternating feet (i.e. go up a step with one foot, then tackle the next step with the other foot).

PediaTip: It’s more challenging to climb stairs with alternating feet than to put both feet on each step, so make sure to spot your child as they work on this new milestone.

Fine Motor Skills

Fine Motor Skills are Skills That Require Small Muscle Groups to Work Together. From a Fine Motor Skills Perspective, a 2.5-Year-Old May Be Able To:

  • Catch large balls.
  • Copy a vertical line.
  • Drink from an open cup.
  • Spear food with a fork.
  • Wash and dry their hands.

Expressive Language Skills

Expressive Language Refers to the Words and Sounds That a Child Can Generate. At 2.5 Years, Kids are Usually Able To:

  • Use pronouns correctly (e.g. “That mine”).
  • Speak in a way that’s 50-75% intelligible to strangers.
  • Say at least 200 words. At this point, you’ve probably lost track of the number of words your child can say, and that’s a good thing!
  • Use 2- to 3-word phrases.
  • Ask “why?” and “where?” (about everything).

Receptive Language Skills

Receptive Language Skills Center Around a Child’s Ability to Understand Language (e.g. to Follow Commands). At 2.5-Years, Kids May:

  • Confidently complete 2-step commands.
  • Begin to follow 3-step commands. An example of a 3-step command is: “please pick up your toy, then put it away, and come back to the sofa. Thanks!”
  • Be able to point to 6 different body parts (when asked).

Social-Emotional Skills

Social-Emotional Skills Refer to How Kids Interact With the World Around Them. On Average, 2.5-Year-Olds:

  • Try to get their parents to watch them by saying, “Look at me!”
  • Engage in “Onlooker Play” (watch other children play) and begin to participate in “Parallel Play.” During parallel play, kids play side by side but don’t interact with one another.

    Insider Info: Even though your child may appear to be ignoring the other kids, they’re actually paying attention to them (on the down-low).

    Note: Kids don’t typically initiate play with other kids until they’re older (think: 3.5 years or so). Get Wise about the 6 Stages of Play that kids go through during childhood.

Kids Also Love “Imaginative Play” at This Age. Imaginative Play is When They Role-Play Scenarios They’ve Seen (Such as Pretending to Cook in the Kitchen or Talk on the Phone).

PediaTip: Fun toys at this age include “play” lawnmowers, kitchens, vacuum cleaners, shopping carts, and cellphones.

Additional Developmental Skills for This Age Group Include:

  • Pees and Poops in the Potty (With Varying Degrees of Success).

    Get Wise about Potty Training.
  • Is Aware of Gender, Including Their Own.

A Word About Articulation Issues

As Your Child’s Vocabulary Expands, You May Notice That They Mispronounce Certain Words. Although Mispronounced Words Sound Kind of Cute, They Can Be a Sign of a Budding Articulation Issue.

In Order for Kids to Say Words Properly, They Must:

  • Have intact hearing.
  • Understand what’s being asked of them.
  • Be able to coordinate the placement and movement of their tongue, lips, teeth, and jaw.

Basically, There’s a Lot That Goes Into Pronouncing Words Correctly.

Kids aren’t expected to be able to pronounce all of their words correctly until about 8 years of age. Let the doctor know, though, if non-family members have trouble understanding more than half of what your child is saying or if your child struggles to articulate many words (especially if they’ve had a bunch of ear infections in the past, since ear infections can impact hearing).1 

In the Meantime, Here are Some Things You Can Do at Home to Improve Your Child’s Articulation:

1. Be a Chatterbox: Talk to your child throughout the day and model the correct way to say words.

2. Make Good Eye Contact: Get down to your child’s level and look directly at them when you’re speaking.

3. Keep the White Noise to a Minimum: Turn off Spotify, the TV, and the vacuum at home when you talk to your child. 

4. Read Aloud: Read to your child daily (if possible). It doesn’t have to be for long (5-10 minutes works just fine).

5. Find Your Inner Parrot: Repeat what your child says with the proper pronunciation. For example, if they say, “Where da ber?” while reading a book, you can say, “Where is the bear? I think it’s behind the tree on this page.” 

PediaTips:

  • Do this with a light tone so it doesn’t seem like you’re correcting them. 
  • Don’t do this for every sentence or your kiddo will think you’re super annoying. 

Bonus Tips:

  • Show and Tell: If you don’t understand what your child is saying, ask them to show you what they’re talking about (if applicable).
  • Sing: Make it fun. Belt out songs as a way to practice words together.

Recap: Articulation problems in toddlers are fairly common and often improve on their own. If your toddler’s articulation issues persist, the pediatrician may recommend a hearing test and refer your child to a speech & language therapist.

The Bottom Line

Your child’s pediatrician will assess their development at every checkup, including at the 2.5-year visit. If you’re worried that your child isn’t reaching their milestones on time, voice your concerns at the visit or book a separate appointment to discuss their development in more detail. 

Celebrities Are Just Like Us!

“Every night before I get my one hour
of sleep, I have the same thought:
‘Well, that’s a wrap on another day of

acting like I know what I’m doing.’
I wish I were exaggerating, but I’m not.
Most of the time, I feel entirely

unqualified to be a parent.
I call these times being awake.”

~Jim Gaffigan

Sneak Peek: After the 2.5-year checkup, the next checkup will be at 3 years of age. After that, your child will switch to yearly checkups.

The Reminders for This Week are the Same as Last Week’s. Get Wise About Them Below…

  • Limit Your Child’s Whole Milk to 16-20 Ounces Per Day (Starting at 2 Years of Age).
  • Feed Your Child What You Eat, But Cut Into Bite-Sized Pieces.
  • Steer Clear of Choking Hazards. Get Wise About the Top 10 (Food) Choking Hazards Here.
  • Brush Your Child’s Teeth Twice a Day (Especially After the Last Meal of the Night) and Have Them Visit the Dentist Every 6 Months (Unless the Dentist Says Otherwise).
  • Call the Doctor If Your Child Spikes a Fever Above 102.2°F OR If They Develop Any Other Worrisome Symptoms (Such as Lethargy or Poor Feeding).
  • Continue to Give Your Child a Daily Vitamin D Supplement (600 International Units Per Day).
  • Keep Your Child in the Rear-Facing Position in Their Car Seat Until They Exceed the Height and Weight Restrictions Outlined by the Manufacturer.

And…That’s a Wrap!

Welcome to Month 29 (Week 3) of Parenting Your Toddler!

In This Week’s PediaGuide Article, We’ll Discuss:

Get Wise About It All Below…

It’s natural for parents to want to know how their kids (physically) “measure up” to their peers. While most comparisons are subjective (read: inaccurate), the growth chart is an objective way to see how your child’s growth compares to that of other kids of the same age and gender. In this week’s PediaGuide article, we’ll revisit the growth chart and how to read it. In addition, we’ll delve deeper into the topic of children with “failure to thrive” (i.e. kids who aren’t growing as well as we’d like). But, first let’s start off with some stats.

Growth Stats for 2-to-3 Year-Olds:

  • At Age 2:
    • Children have (more or less) quadrupled their birth weight.
    • They’re also about half of their final adult height.
  • The Average Height & Weight Measurements for 2.5-Year-Old Girls in the U.S Are as Follows:
    • Average Height = 35.6 inches (almost 3 feet tall).
    • Average Weight = 28.8 pounds.
  • And Here are the Average Height & Weight Measurements for 2.5-Year-Old Boys in the U.S.:
    • Average Height = 36 inches (3 feet tall).
    • Average Weight = 29.9 pounds
  • Between Ages 2-3, Kids Typically:
    • Gain 4-6 pounds.
    • Grow 2-3 inches.

The Growth Chart (Revisited)

Pediatricians use 2 main charts to plot their patients’ growth: The CDC (Centers for Disease Control and Prevention) growth chart and the WHO (World Health Organization) growth chart.

What’s the Difference Between These Two Growth Charts?

  • The CDC growth chart only looks at children in the United States, whereas the WHO growth chart compares children across the world. 
  • In addition, the CDC publishes growth charts for kids up to age 18, whereas the WHO growth chart only goes up to age 5.

So, Which Growth Chart Do Doctors Use?

The CDC itself recommends that healthcare providers in the U.S. use the WHO growth chart for the first 2 years of life and the CDC growth chart for kids 2 years and older.1 

A Quick Heads Up:

  • Kids in the U.S. tend to be heavier and shorter (on average) than their peers abroad.
  • Because of this, children often experience an artificial drop in their growth percentiles at age 2, when they’re switched from the WHO growth chart (which compares them to kids around the world, including to malnourished children in developing countries) to the CDC growth chart (which only looks at children in the U.S.).

    In this case, the dip in percentiles is because of the switch to the CDC growth chart, not because of a change in the child’s growth rate. 

    Insider Info: Some doctors in the U.S. use the CDC growth chart the whole way through (from birth until adulthood) to avoid this issue.

Specialized Growth Charts

In addition to the CDC and WHO growth charts, there are specialized growth charts for kids who were born prematurely and those with Down syndrome, hypothyroidism, and Turner’s syndrome (to name a few). Premature babies typically switch from the premature growth chart (aka the Fenton Growth Chart) to the standard growth chart at 2 years of age (corrected).

Common Question: How Do Doctors Create Growth Charts?

Most doctors use electronic medical records that automatically plug their patients’ measurements into the growth chart. Before practices went paperless, the growth charts were done by hand.

If You Measure Your Child at Home and Want to Know Where They Fall on the Growth Chart, You Can Either:

1. Print out the growth chart (Google the one you want) and plot the measurements by hand.

OR

2. Go online and use the CDC growth chart calculator, which does all of the math and plotting for you. 

PediaTip: There will be some natural variation between your home scale and the scale at the doctor’s office. Therefore, use your home measurements to obtain a ballpark figure and the doctor’s measurements to officially track your child’s growth.

Below are the CDC Growth Chart Templates for Kids Zero to 3 Years (36 months) of Age. 

The first chart is for boys and the second chart is for girls.

Image Source: CDC

Image Source: CDC

To Plot Your Child’s Growth by Hand, Find Their Age (in Months) on the X-Axis and Their Weight or Length on the Y-Axis, Then Draw a Dot Where the Values Intersect. 

How Do Doctor’s Interpret Growth Charts?

The pediatrician will probably throw a bunch of percentiles at you when discussing your child’s growth chart. 

But What Do They Mean? The percentiles make a comparison between your child’s growth and that of other children who are the same age and sex. 

Here Are Some Examples:

1. DocTalk: The doctor tells you that your 30-month-old son is at the 50th percentile for weight on the CDC growth chart for boys 0-36 months.

Intepretation: This means that half of all male 30-month-olds in the U.S. (with the same birthday) weigh more than him, while the other half weigh less.

2. DocTalk: The doctor mentions that your 2-year-old daughter is at the 75th percentile for length on the CDC growth chart for girls 0-36 months.

Interpretation: This means that your daughter is longer than 75% of 2-year-old girls (with her birthday) in the U.S., and shorter than 25% of them.

Reality Check: Your child’s growth percentiles are not like a grade on a math test. Higher doesn’t necessarily mean better. Instead, focus on whether your child is following their own curve. If so, their rate of growth is on track. 

What If My Child Is “Falling Off Their Curve” (i.e. Not Growing Appropriately)? 

If your child is below the 3rd percentile for height or weight OR their curve has crossed 2 major percentile lines in the downward direction (for example, their height went from the 75th percentile to the 25th percentile), then they may be diagnosed with “failure to thrive.” In this case, the doctor will ask you a bunch of questions and may run a few tests to determine the cause of the poor growth and how to treat it.

Get Wise(r) About Failure to Thrive and How It’s Managed, Below…

Failure to Thrive (On Repeat)

A bunch of different things can cause failure to thrive. To make things easier, the medical world divides failure to thrive into 2 main categories:

1. “Inorganic” Failure to Thrive.

2. “Organic” Failure to Thrive.

  • “Inorganic” failure to thrive is the most common type of failure to thrive, and accounts for 90% of cases.1 Inorganic failure to thrive occurs when the caregiver either accidentally or deliberately underfeeds the child.  
  • “Organic” failure to thrive, on the hand, is caused by an underlying medical problem. Causes of “organic” failure to thrive include (but aren’t limited to):
    • Low thyroid levels (hypothyroidism).
    • Metabolic diseases.
    • The malabsorption of nutrients.
    • Kidney issues.
    • Bad gastroesophageal reflux disease (GERD).
    • Other chronic illnesses.

What Can Doctors Do About Failure to Thrive?

Docs Do the Following to Manage Failure to Thrive:

1. They look for the root cause of the failure to thrive.

2. They beef up the child’s calories.

3. And, in rare cases, they may treat the child in the hospital.

Get Wise About the Details Below:

1. Finding the Root Cause: The first step in managing failure to thrive is to do a comprehensive feeding assessment. The purpose of the feeding assessment is to determine how many calories the child is taking in (and burning) each day. The doctor may even ask the parents to keep a food diary for a short period of time to track their child’s input and output.

Parents may be accidentally (or in rare cases, intentionally) underfeeding their kiddo. Or their child may be a picky eater with a feeding aversion. A feeding aversion means the child gets stressed when they eat and doesn’t want to do it. If a feeding aversion is the culprit, then a trip to a feeding therapist may be in order.

If the calories look appropriate, the doctor will do various lab tests to search for an “organic” (medical) cause for the failure to thrive.

2. Beefing Up the Calories for Toddlers: The best way to increase a toddler’s calories is to offer high-fat and high-calorie foods. I’m talking about the “good” kind of fat here (vs. junk food). Examples of “good fats” include avocados, cheese, yogurt, and butter.

The doctor may also recommend that the child go back to drinking whole milk (if they’ve already switched to a lower fat milk) and add smoothies and PediaSure to their diet.

3. Upping the Ante: If nothing seems to be working and the child continues to fail to thrive, they’ll need to be hospitalized. In the hospital, they’ll undergo additional testing and may be fed through a tube that goes down their nose (fancy name: nasogastric tube).

Reality Check: Hospitalization isn’t usually necessary.

The Last Resort: Kids with chronic illnesses who can’t keep their weight up or meet their nutritional needs may end up needing a G-tube (aka a gastric tube). This is a tube that’s surgically implanted in the stomach through the abdominal wall. Parents can feed their child a high-calorie formula through the tube (directly into their gut). G-tubes are rarely needed, though, especially in kids who are otherwise healthy.

The Bottom Line

Most failure to thrive cases are due to unintentional underfeeding and can be corrected pretty easily. Continue to keep your child’s pediatric appointments so they can be measured and plotted on the growth chart at regular intervals. 

“We cannot always build a future
for our youth, but we can always
build our youth for the future.”

~Franklin D. Roosevelt

Sneak Peek: The 2.5-year visit is right around the corner. Make an appointment if you haven’t already.

The Reminders for This Week are the Same as Last Week’s. Get Wise About Them Below…

  • Limit Your Child’s Whole Milk to 16-20 Ounces Per Day (Starting at 2 Years of Age).
  • Feed Your Child What You Eat, But Cut into Bite-Sized Pieces.
  • Steer Clear of Choking Hazards. Get Wise About the Top 10 (Food) Choking Hazards Here.
  • Brush Your Child’s Teeth Twice a Day (Especially After the Last Meal of the Night) and Have Them Visit the Dentist Every 6 Months (Unless the Dentist Says Otherwise).
  • Call the Doctor If Your Child Spikes a Fever Above 102.2°F OR If They Develop Any Other Worrisome Symptoms (Such as Lethargy or Poor Feeding).
  • Continue to Give Your Child a Daily Vitamin D Supplement (600 International Units Per Day).
  • Keep Your Child in the Rear-Facing Position in Their Car Seat Until They Exceed the Height and Weight Restrictions Outlined by the Manufacturer.

And…That’s a Wrap!

Welcome to Month 29 (Week 2) of Parenting Your Toddler! 

In This Week’s PediaGuide Article, We’ll Discuss:

Get Wise About It All Below…

When toddlers exhibit “strange” behaviors their parents often call the pediatrician or turn to Dr. Google to try to figure out if the behavior is normal. Some of the “odd” toddler behaviors that we see are voluntary (think: licking walls and putting toys in their ears), while others are involuntary (think: breath-holding spells, tics, and seizures).

Get Wise below about breath-holding spells, tics, and seizures, including what to do about them and how they overlap.

Breath-Holding Spells (Revisited)

As you may remember from the baby PediaGuide articles, breath-holding spells are episodes in which a child gets so freaking upset they hold their breath and (usually) pass out. While breath-holding spells may seem like a big F-U to parents, they’re not actually done on purpose.

There are 2 Types of Breath-Holding Spells:

1. Cyanotic Breath-Holding Spells: In this case, the child unintentionally holds their breath (for up to a minute) and turns blue in the face. This is the most prevalent type of breath-holding spell and is usually triggered by a tantrum.  

2. Pallid Breath-Holding Spells: With Pallid Breath-Holding Spells, the child “forgets” to breathe, causing their heart rate to slow down and their face to turn pale. Pallid spells are much less common than cyanotic breath-holding spells and are generally precipitated by a minor injury or a fright.

Who Gets Breath-Holding Spells?

  • Young Children: Breath-holding spells occur in children 6 months-6 years but are most common in 1-to 3-year-olds (think: the toddler tantrum years!).
  • Children With a Family History of Breath-Holding Spells: Oddly enough, breath-holding spells tend to run in families. In fact, 20-35% of children with breath-holding spells have a family member who had them as a child.1 Go figure!
  • Kids With Iron Deficiency Anemia (i.e. a Low Number of Healthy Red Blood Cells Due to Low Iron Levels): Research shows that children with iron deficiency anemia are particularly prone to breath-holding spells.

Are Breath-Holding Spells Serious? 

Although breath-holding spells look scary (and are often misdiagnosed as seizures), they’re actually fairly benign. Fortunately, the act of passing out will make your child breathe normally again and cause their heart rate to come back up.  

Full Disclosure: In rare cases, breath-holding spells have been followed by a seizure. This is definitely not the norm, though, and if a seizure does occur in this scenario, it’s unlikely to be a serious one that has lasting effects.

What Can I Do If My Child Develops Breath-Holding Spells?

You’ll want to get your child checked out the first time they pass out from a breath-holding spell.

Why’s That?

Because:

1. You probably won’t know what’s going on since you’ve never seen your child have a breath-holding spell.

2. The doctor will want to rule out other reasons for the fainting. 

The evaluation will most likely take place in the ER but call the doctor (or 911 if it seems like an emergency) for guidance first. The doctor will probably order blood work (to look for anemia) and an EKG (which measures the electrical activity of the heart).

If your child develops recurrent breath-holding spells, you’ll become a pro at identifying them and won’t have to rush your child to the doctor every time one occurs (unless the breath-holding spell is more concerning than past spells).

Clues That the Fainting Was Due to a Breath-Holding Spell and Nothing More:

  • Your child was freaking out and crying hysterically before it happened.
  • Your child is back to normal after passing out. Children who’ve had a seizure, on the other hand, are usually sleepy and “out of it” afterwards (fancy name: postictal confusion).
  • Your child is between 6 months and 6 years of age.
  • The episode was not associated with jerking movements, vomiting, involuntary urination, a fever, a head injury, or any other concerning signs or symptoms.

The Bottom Line: If your child develops breath-holding spells, they’ll probably have more than one, and you’ll become an expert at spotting them. Fortunately, breath-holding spells aren’t a permanent part of life: ALL children outgrow them and most of the spells dissipate by age 4.

Tics in Toddlers

Tics, like breath-holding spells, can emerge in toddlerhood and aren’t done on purpose, either.

What are Tics?

They’re rapid and repetitive involuntary movements or sounds.

What Do Tics Look Like?

It Depends on the Tic.

  • Signs of Common Motor Tics Include: Recurrent lip biting, shoulder shrugging, blinking, and grimacing.
  • Signs of Classic Vocal Tics Include: Repetitive humming, throat clearing, squealing, barking, shouting, and sniffing.

There are 3 Main Types of Tic Disorders. They Are:

1. Provisional Tic Disorder: These are isolated motor tics OR verbal tics that last less than 1 year. Provisional tics are fairly common in kids 2-15 years of age.

2. Chronic Tic Disorder: These are isolated motor tics OR verbal tics that persist for more than 1 year.

3. Tourette’s Syndrome: In Tourette’s Syndrome both motor tics (2 or more) and verbal tics (1 or more) are present for more than 1 year.

Note: The 3 Tic Disorders Described Above Tend to Run in Families and Occur More Frequently in Boys (Than Girls).

Fast Facts About Tourette’s Syndrome:

  • When people think of Tourette’s Syndrome, they often think of people inappropriately shouting out random curse words. Cue the movie “Deuce Bigalow” (a classic). In reality, less than 10% of people with Tourette’s syndrome compulsively swear (fancy name: coprolalia).2
  • The majority of people with Tourette’s syndrome have an above-average to high level of intelligence.
  • Famous people with Tourette’s syndrome include: Dan Aykroyd (think: “Blues Brothers”) and David Beckham (the soccer star). Wolfgang Amadeus Mozart was also thought to have Tourette’s Syndrome.3

Tics That Last More Than 1 Year Often Occur in Conjunction With Other Conditions, Such as Attention-Deficit Hyperactivity Disorder (ADHD), Anxiety, and Obsessive-Compulsive Disorder (OCD).

How are Tics Treated?

Most tics are short-lived (they last only a few months) and disappear on their own without intervention. Kids can’t control their tics, so asking them to “suppress” them doesn’t work. In the short-term, it’s best to ignore tics and teach your child self-soothing skills (such as mindfulness practices), instead. Why? Because stress and excitement make tics worse.

The Types of Tics That Typically Require Intervention Include:

  • Chronic tics (those that last 1 year or more).
  • Tics that are part of Tourette’s syndrome.
  • Tics that noticeably interfere with daily functioning.

These More Severe Tic Disorders Can Be Managed With the Following:

1. Cognitive Behavioral Therapy (CBT)

During CBT, a Child is Taught To:

  • Recognize the situations that trigger their tics.
  • Notice the “premonitory urge” (the uncomfortable feeling in the body) that precedes the tic. This urge disappears when the tic occurs, leading to a feeling of relief. The trick is to lessen the urge (e.g. through relaxation techniques) OR to replace the tic with another action (such as taking a deep breath) when the urge appears.

2. Medication.

There are several medications on the market that can help with tics. Examples include clonidine (aka Catapres, Kapvay) and guanfacine (aka Intuniv, Tenex). Although these medications don’t cure tics, they can reduce their severity.

A Word About Seizures

Both tics and breath-holding spells can mimic (and be misdiagnosed as) seizures.

What are Seizures?

Seizures are sudden electrical disturbances in the brain, caused by the misfiring of neurons (the cells that make up our nervous system).

  • Generalized Seizures are caused by the misfiring of neurons on both sides of the brain.
  • Focal (“Partial”) Seizures are caused by the misfiring of neurons in only one part of the brain.

PediaTrivia: Focal seizures can evolve into generalized seizures.

What Do Seizures Look Like? 

Although Seizures Can Vary in Appearance, They’re Often Characterized By:

  • Rhythmic jerking or twitching of the arms & legs.
  • Stiffening of the body.
  • Loss of body tone. In this case, the body goes limp, and the child falls to the ground. This is common in “atonic,” aka “drop,” seizures.
  • Eyes rolling to one side or in the back of the head.
  • Spacing out.

    Note: “Absence seizures” present this way and can be hard to diagnose. They’re often written off as daydreaming.
  • Lip smacking, repetitive swallowing, and smelling weird smells that aren’t there.
  • The lips turning blue.
  • Loss of urine or bowel control (i.e. accidentally peeing or pooping oneself).
  • Confusion and sleepiness afterwards (aka “postictal confusion”).

What Causes Seizures?

Different Things Can Cause Neurons to Misfire.

The Top 5 Causes of Seizures in Kids Are:

1. A Rapidly Rising Body Temperature (Causing a “Febrile Seizure”).

Febrile seizures are one of the more common types of seizures in kids. Although scary to witness, they’re usually relatively benign.

Get Wise(r) about febrile seizures, here.

2. An Infection (With or Without a Fever)

For example, meningitis (inflammation of the tissues – the meninges – surrounding the brain and spinal cord) can cause a seizure.

3. Head Trauma.

4. A Toxic Ingestion (Such as Drinking Laundry Detergent or Dishwasher Fluid).

5. An Electrolyte Imbalance (Such as Low Sodium) or a Metabolic Disorder (Such as Gaucher Disease Type 2).

Note: Metabolic disorders are often inherited and typically show up early in life (during infancy). They’re often picked up by the newborn screen blood test, that’s done at birth.

Insider Info: Brain tumors can also cause seizures in children but they’re not a common cause of them.

A Word About Epilepsy

  • Epilepsy is a neurological disorder that causes abnormal brain activity and recurrent seizures.
  • A diagnosis of epilepsy can be made only if a child has had 2 or more unprovoked seizures at least 24 hours apart.

    Unprovoked in this case means the seizures were not caused by an acute, reversible problem such as a fever or low blood sugar.

    Therefore, not all seizures are considered epilepsy. 
  • Insider Info: Call 911 if your child exhibits seizure-like behavior (for the first time) and Get Wise about how to manage seizures if they do occur.

    The Bottom Line

    Breath-holding spells and tics are relatively common and (often) benign occurrences in toddlers. Seizures are less common, especially seizures that are due to a neurological problem (aka “unprovoked seizures”). If your toddler develops strange behaviors or movements, let their doctor know and videotape the episode, if possible. (Don’t worry if you can’t, though – it can be hard to get footage in the heat of the moment.)

“First child eats dirt.
Parent calls doctor.
Second child eats dirt.

Parent cleans out mouth.
Third child eats dirt.
Parent wonders if they

really needs to feed him lunch.”

~Someecards

The Reminders for This Week are the Same as Last Week’s. Get Wise About Them Below…

  • Limit Your Child’s Whole Milk to 16-20 Ounces Per Day (Starting at 2 Years of Age).
  • Feed Your Child What You Eat, But Cut Into Bite-Sized Pieces.
  • Steer Clear of Choking Hazards. Get Wise About the Top 10 (Food) Choking Hazards Here.
  • Brush Your Child’s Teeth Twice a Day (Especially After the Last Meal of the Night) and Have Them Visit the Dentist Every 6 Months (Unless the Dentist Says Otherwise).
  • Call the Doctor If Your Child Spikes a Fever Above 102.2°F OR If They Develop Any Other Worrisome Symptoms (Such as Lethargy or Poor Feeding).
  • Continue to Give Your Child a Daily Vitamin D Supplement (600 International Units Per Day).
  • Keep Your Child in the Rear-Facing Position in Their Car Seat Until They Exceed the Height and Weight Restrictions Outlined by the Manufacturer.

And…That’s a Wrap!